The ever fabulous Martha Stewart Weddings has recently launched a DIY section on their site with ideas for everything from favors to to decor to gifts to save-the-dates, and they even have downloadable instructions and printable templates. If you’re a crafty kind of couple looking for fun projects, head on over and check it out!
While visiting the lovely wedding blog Once Wed the other day (Hi Emily!) I ran across this sweet DIY project for a rustic wedding cake stand created by the uber-talented Laurie Cinotto of LaLaLaurie. Each stand is simply made from slices of tree trunks and branches and just couldn’t be a more charming addition to a whimsical, rustic themed wedding! Visit Once Wed for the full set of DIY instructions, and check out the inspiration boards below for beautiful wedding looks that these cake stands could fit right into.
What Youll Need A Cross-Cut Wood Plaque (round or oval) A Cross-Section of a Tree Limb (Make sure the top and bottom are parallel) Titebond Ultimate Wood Glue (or a similar extra strong wood glue) A Large Wood Clamp
Resources: Cross-cut wood plaques can be found in your local craft store or online at Hofcraft. They come in a variety of sizes ranging from 5 inches to 12 inches in diameter. They are usually found in the section with the wood-burning kits and other wood crafts. They are clean, sanded and ready to use.
This navy and cream colored fall wedding inspiration board was created for Junebug reader Sara, to help her come up with ideas for her rustic and elegant wedding taking place in a converted equestrian barn. I love the idea of adding in the organic tree cake stands to showcase the food that is so important to this couple, and to delicately contrast with all the sparkling glass and chandelier filled decor.
Top row: Sara’s elegant strapless ivory satin and french lace overlay dress by Monique Lhuillier, Navy blue and white wedding cake by The Cake Girls, Cheese plate image by Matt Armendariz.
Second row: Vintage crystal chandeliers over a long wooden dinner table makes the all important 3 course dinner the focus of the celebration. Image by Thayer Allyson Gowdy via Oh How Charming, from the wedding of the lovely Elizabeth Messina.
Fourth row: Fall fruits are gorgeous as decor and combine beautifully with flowers, as in this flower, feather and fruit bridal bouquet by Hollyflora, and this centerpiece by Garden Party Flowers, photographed by Stephanie Cristalli.
Fifth and Sixth rows: Local, seasonal foods and wines are as beautiful to look at as they are to eat, so use them in your decor! Sara and her fiance have recently started making jam, so they will give away mini jars of their home made goodness as wedding favors. All images by the genius Matt Armendariz of MattBites.com.
And the wooden cake stands would also look amazing alongside the elements in this board inspired by the Real Wedding of Lisa and Brent and their muted wedding color palette of pale blue, khaki and pink.
Fourth row: Twig Organic cake stand from NeimanMarcus.com, white bouquet of spray and tea roses, lisianthius buds and flowers, ranunculus and velvet-stemmed tweedia from MarthaStewart.com
Loving this DIY project for gorgeous wedding tabletop decor from Suset Magazine (via Inspired Goodness, thanks Kimberly)! Collect vintage metal, glass or ceramic goblets from thrift stores and flea markets and follow these easy steps to make them into pretty candle votives. What incredible wedding centerpieces these would make alongside romantic floral arrangements! The how-to directions are listed below, or visit Sunset.com to read the full article. I might have to get crafty and make these for my own home!
Step 1. After cleaning the goblets with metal polish and a clean cloth, we followed the directions on the package of Microwaveable Soy Wax for Containers (by Yaley; $6.99 for 1 lb.; from joann.com). We used two 1-lb. packets for six vessels. Other required materials included newspaper to safeguard our surface, a candy thermometer, and a microwave-safe measuring cup with a spout.
Step 2. After heating the wax flakes in a microwave-safe container until melted (30 to 60 seconds, depending on the strength of the microwave), we tested the temperature with the thermometer and let the wax cool to 125°.
Step 3. To help keep the Pre-Waxed Medium Bleached Wick with Wick Clip (by Yaley; $2.99 for six; from joann.com) in place ? it falls limp when the wax is poured ? we used wooden skewers and painters tape. Once secured, we poured wax into each vessel to about 1/8 in. below the rim.
Step 4. After about 30 minutes, we poked holes in the hardening wax near the wick to let air escape (the wax will sink a bit). We then melted the remaining wax and filled the vessels back up to the original fill line.
Step 5. Finally, we let the wax cool for a couple of hours, then trimmed the wicks to ¼ in.
Today’s Real Wedding of Selome and Abiy comes to us from John and Joseph Photography, and is so full of life, love, excitement and community I could hardly narrow the photos down! This gorgeous couple met through mutual friends in Addis Ababa on New Year’s Eve 2004, and soon after that Selome knew that Abiy was the one!
Their goal was to plan a wedding that included their huge groups of friends and family, and really make everyone feel involved. Because they had so many events throughout their wedding weekend, including a traditional Ethiopian ceremony and reception the day after this one, it was the perfect opportunity to include everyone in the planning duties. Aunts, uncles and parents formed a wedding committee that met regularly and delegated many responsibilities, and Selome’s mother and Godfather Danny acted as the main wedding coordinators. It was truly a family affair!
The wedding day started with Selome and Abiy each getting ready with their friends, and then as Ethiopian tradition states, Abiy, his groomsmen and his family arrived to pick up Selome from her parent’s house where everyone was celebrating with dances and songs. According to Selome, “It was so much fun because the tradition is that my family is supposed to give his groomsmen a hard time and try to make them earn the right for the groom to enter into my house. Everyone sings traditional Ethiopian wedding songs, it is chaotic, loud and so much fun!” Love it!
The wedding ceremony was a traditional Ethiopian Orthodox ceremony held at St. Gebrie churchl in Seattle. With all the activity of the day, Selome and Abiy cherished their romantic moments alone together as they rode in a vintage Rolls Royce on the way to and from the church. “When we entered, the church choir was singing and it was a celebration. It was important to us to have the traditional blessings of our marriage in our church. Part of this ceremony includes the beautiful hand embroidered, gold encrusted crowns and capes that signify the meaning of marriage and how it is a special covenant before God. Also, it was in the Amharic language so we provided programs with English translations so our guests could follow along.”
After the ceremony the wedding party took time for fun photos at Hamilton View Point Park and the Olympic Sculpture Park, and then arrived in style at the reception at the Waterfront Marriott Downtown Seattle. Selome chose orange, gold and cream with touches of chocolate brown as their wedding color palette, and she loved how vibrant and tropical the orange color looked on all the bridesmaids with their beautiful skin tones. Selome carried a white and cream bouquet and the bridesmaids flowers were orange and cream. For the décor she wanted a very clean look, so she chose all white and cream for the linens, table flowers, and backdrops. Orange was used as a minor accent on the cake table, in some of the floral arrangements, and in the the up lights, spotlights and the monogram on the dance floor. Beautiful! Selome’s mother and aunt made homemade Ethiopian honey wine as favors for all 600 of their guests, and everyone danced until well after 3am! The night ended in a sentimental and meaningful tradition, with Selome and Abiy kissing goodbye all of their family elders one by one as they stood in a line. “It is almost like a rite of passage where we are leaving them to start a new life together,” said Selome.As you can imagine, everyone was in tears! What a perfect way to end the night.
Thank you Selome and Abiy for sharing such a spectacular and sweet event with all of us! For more information on this wedding and the professionals who helped make it happen, please visit our Real Weddings section!
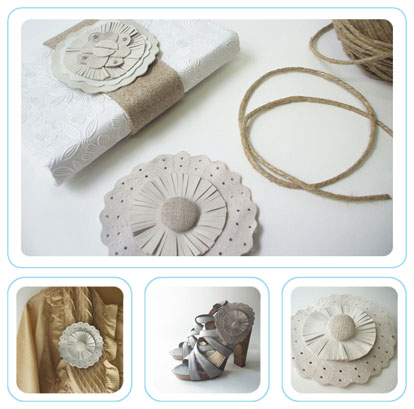
While researching craft projects on the internet for the Junebug Holiday Gift Guide, I was astounded and ridiculously excited by the amount of creative craftiness that people are up to! There are so many great resources, magazines and blogs dedicated to creating things by hand, and so many of the projects could easily translate into wedding ideas. Here are a few projects I came across that are geared toward the Holidays, but could easily be repurposed as wedding decor, wedding favors or gifts to your bridal party and family. So fun! I now have the overwhelming urge to hot glue gun something pretty.
Love this leather brooch from Living Creatively, an absolutely gorgeous, in-depth and inspirational online magazine about all things crafty.
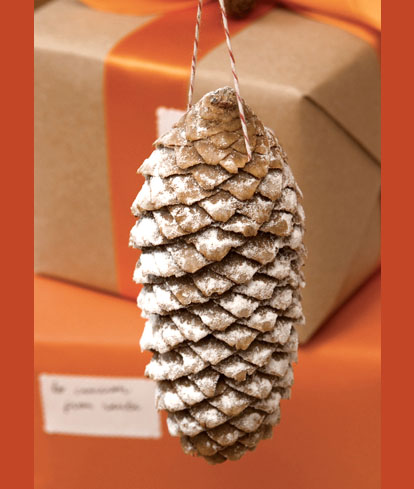
Powder fresh pine cones from Ready Made- Instructions for Every Day Life, an excellent holiday decoration for home or wedding. Check out Ready Made’s fantastic project archives and find step by step DIY instructions on every kind of project, from cooking and sewing to building and lighting.
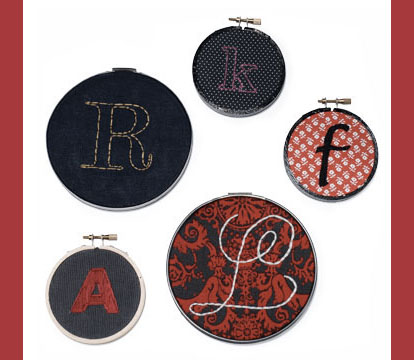
Embroidered Monograms from Ready Made. Make some darling Christmas tree ornaments or embroider them with your bridesmaid’s initials and give each of your girls their own little piece of personalized art.
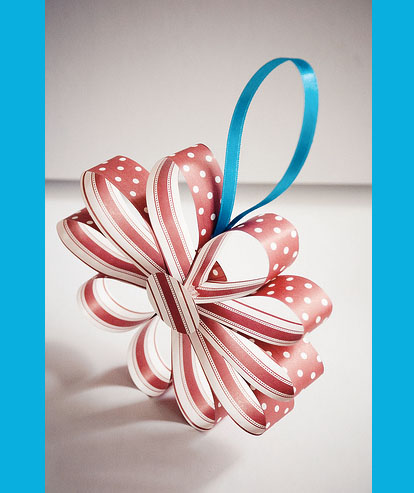
Paper ornaments by Danielle Hamilton Photography, perfect for the holidays in festive red and white paper, but try using pinks, yellows or purples for spring time wedding decor extras. (Via Dollar Store Crafts, via Craftzine. Good ideas get around!)
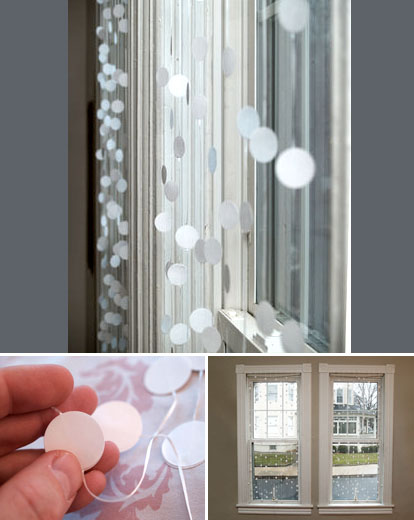
A hanging paper snowstorm from Craft Stylish via Craftzine. Decorate your home windows this winter, or the wall behind your guest book table or cake table at your winter wedding. An inexpensive and super easy project!
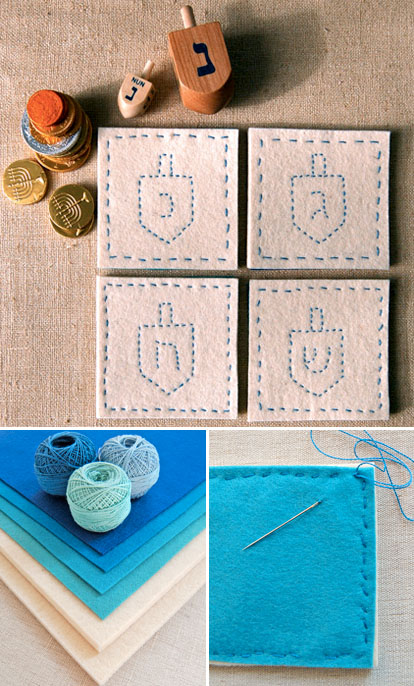
Hand made felt coasters for Hanukkah from Purl Bee via Craft Gossip. Celebrate with them this holiday season, or embroider them with a monogram or wedding logo to give away as thoughtful gifts or to use in your wedding table settings.
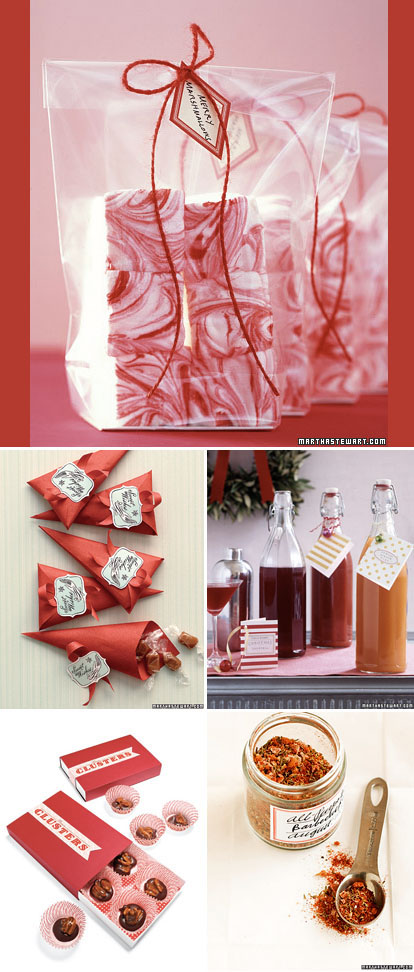
Martha Stewart always has great gift ideas, and these edible treats (via Craft Gossip) would be welcomed by anyone as a holiday gift or a yummy wedding favor. The perfect packaging doesn’t hurt either! Thanks Martha!
Oh-oh, I think I found my new online obsession! For cool DIY save the dates, wedding invitations, shower invitations or favors, Wordle.net makes “word clouds” of any text you enter into its online tool, and lets you change up the fonts, colors, and orientation of the words. Choose each detail yourself, or hit the randomize button and watch new combinations pop up before your eyes. Prepare to lose some serious time playing with Wordle and all its fun possibilities!
While researching great wedding resources for our book, I had so much fun checking out all the creative craft supplies out there on the internet for every kind of wedding DIY project under the sun. From satin ribbons and craft paper favor boxes to patterned paper, card stock, envelopes and gift tags, to the famous Moo cards and their ever expanding array of products, here are a few of our favorites…
The chic papers and high quality ribbon from Kate’s Paperie…
Moo Mini Cards have long been a Junebug favorite, and there is one craft project that’s always seemed like it would be an amazingly fun way to use these for wedding photos- Moo Mini Magnets! You can decorate your fridge, cabinets, a metal wall panel, or any other magnetic surface with handfuls of colorful little slivers of your wedding day. Start by choosing 100 of your favorite wedding photos, have a pack of Moo Minis made, follow the directions below, created by the oh-so-smart blogger and crafty lady from London Meg Pickard, and you’ll soon have “Moognets” of your own!
Top image from Moo.com, all other images by Meg Pickard You will need: Moo mini cards, scissors, self-adhesive magnetic tape (20mm) – I got mine from ebay, but craft shops (especially model-making shops) may have it too – and a big, heavy book. Junebug note: try these links for the magnetic tape- The Container Store, Custom Magnets or Uline.
1. Chop lengths of magnetic tape with the scissors. The lengths should be about 1/2? or so. You will need two for each magnet. (Incidentally, I tried using one continuous strip of tape across the entire back of a card, but it was a bit too magnetic – difficult to lift off a magnetic surface, plus I figured if you can get away with using less tapemore moognets!)
2. Peel off the tape backing and stick one little square at each end of the back of a moo card
3. Put on a flat surface and lie under a heavy book.Not you, silly: the moognet. Because the tape is stored on a roll, and therefore wants to naturally curl, youll need to make sure the adhesive sticks flat to the card. A nice heavy book should handle that: I like John Peels autobiography – a truly weighty tome. Also good for reading.
4. Repeat, until your fingers get bored. Set up a little production line. Recruit some elves, or small children. Dont bother trying to get the cat involved, though: mine was having none of it.
5. You will soon have a nice juicy stack of moognets. You will feel chuffed. You should.
View Meg’s instructions in full on her blog, Meish.org, or on her Flickr page. Thanks for sharing your creative genius Meg! Have fun everyone!
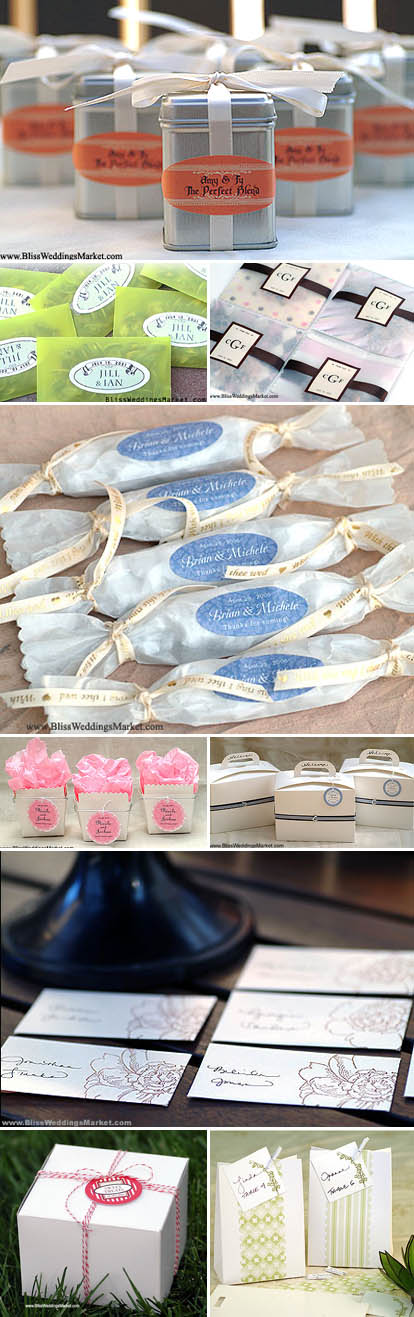
Weddings offer so many possibilities for creative decor and favor ideas that it’s always nice to see great examples of what’s possible. Bliss! Weddings Market is a superstore of pretty packaging, decorations, gifts, ready-to-give wedding favors and DIY supplies, and they have a fantastic photo gallery of specific DIY wedding projects complete with thorough how-to instructions from their Creative Director, Cheryl Galvez. From aluminum tins and paper takeout boxes to glassine envelopes, lovely labels and customized ribbon, they’ve got it all and they know just how to use it!
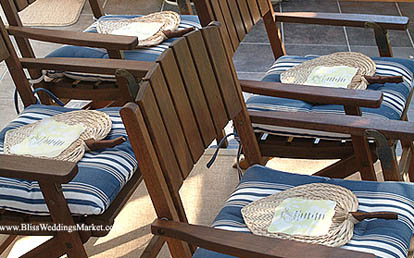
Here’s one of their creative DIY “bride” ideas for displaying your ceremony program on one of their bamboo hand fans. Perfect for a warm summertime ceremony or beach themed wedding! Check out the Bliss website for lots more!
Materials:
Bamboo Fan
1 8-1/2″ x 11″ Patterned vellum paper
1 8-1/2″ x 11″ Solid paper in a coordinating color
Scissors
Glue dots or glue strips (do not use regular glue or tape)
Computer and printer
1-1/2″ wide colored double-faced satin ribbon
Instructions:
Using a glue strip cut to the width of the ribbon, affix one end of the ribbon to the neck of the fan. Wrap around the length of the fan’s handle. Adhere the other end of the ribbon to the bottom back of the handle. For a clean look, make sure the ribbon’s end is at the back of the fan away from view.
Design your ceremony program using your personal computer. Print it directly on to decorative vellum paper available at your local arts and crafts supply store. Overlay the vellum paper on top of the solid color paper. Having a solid color paper underneath the vellum makes the text easier to read. Using your scissors, cut around the ceremony program. In this example, I chose to cut around the program in a wave-like fashion to match the beach-theme wedding I envision for this idea.
Using a glue strip at the top and bottom of the vellum paper, stick it to the solid paper beneath it. Again, use two glue strips to adhere the 2-layered ceremony program to the fan itself. I found that glue dots or glue strips adhere nicely to the natural palm leaves of this fan.
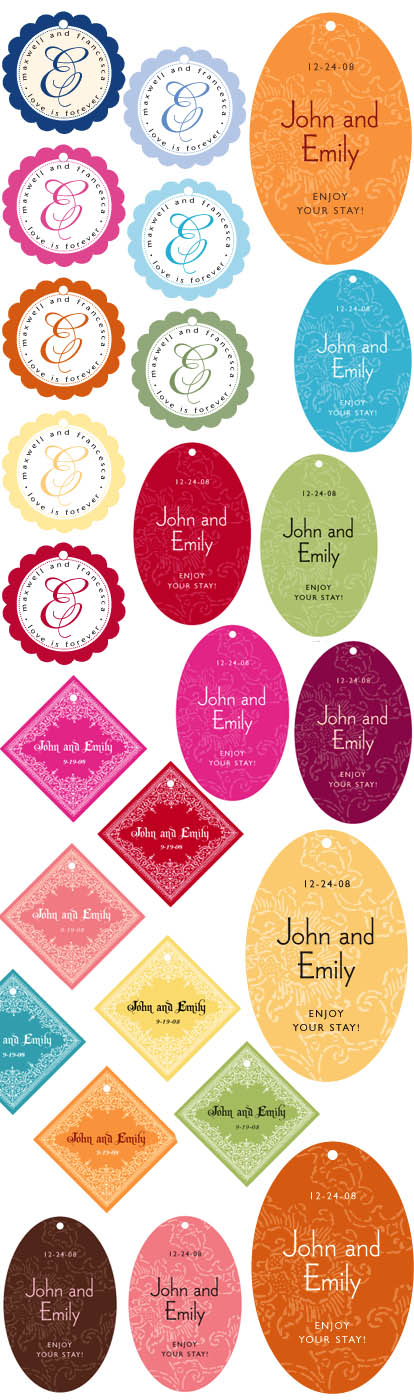
I also love their huge selection of shapes, sizes and color combinations for pretty customized hangtags. These have a million uses for weddings- on favors, gift bags, out of town welcome baskets, seating cards, thanks you gifts, programs; the list is endless! Thanks Bliss!
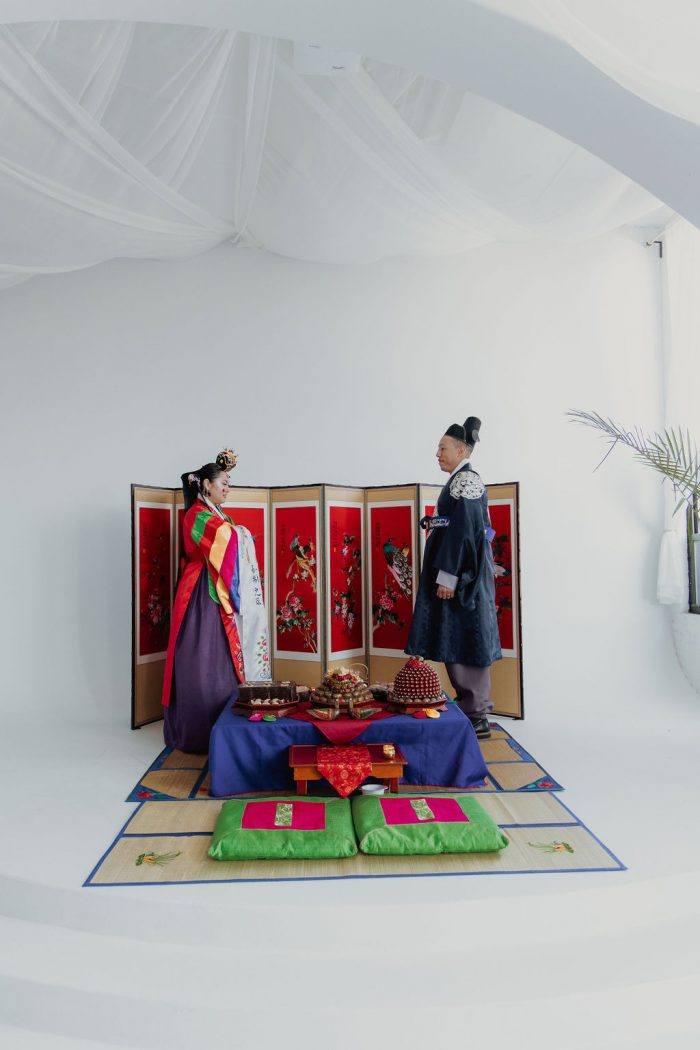
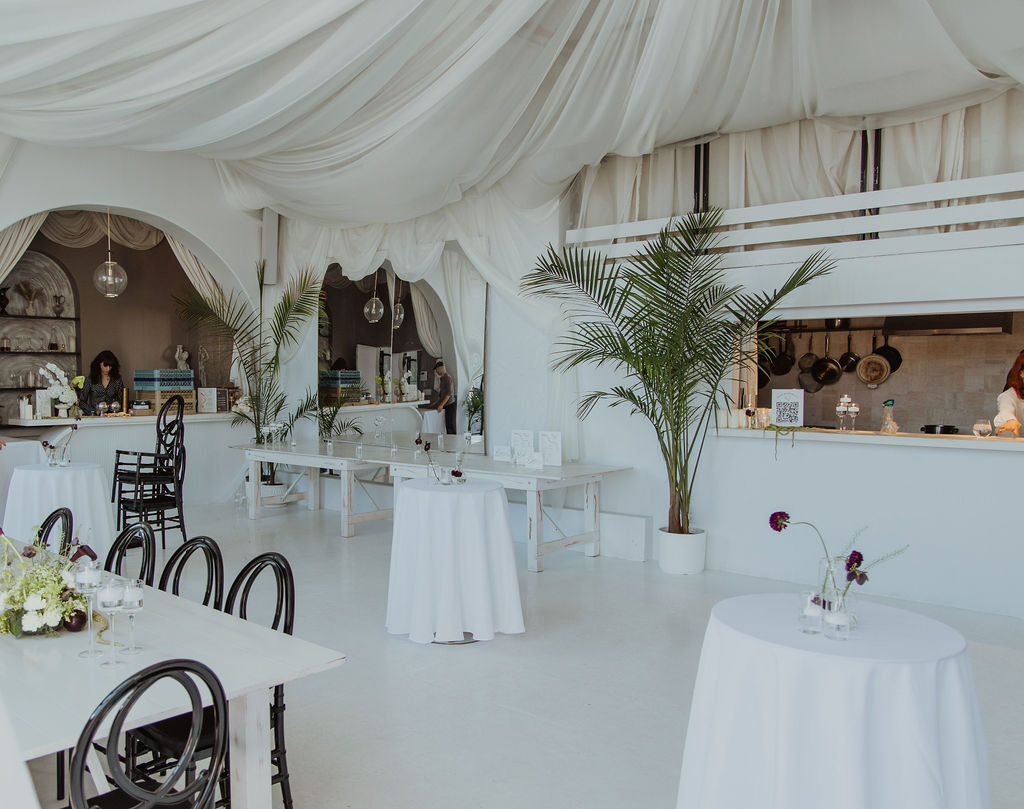
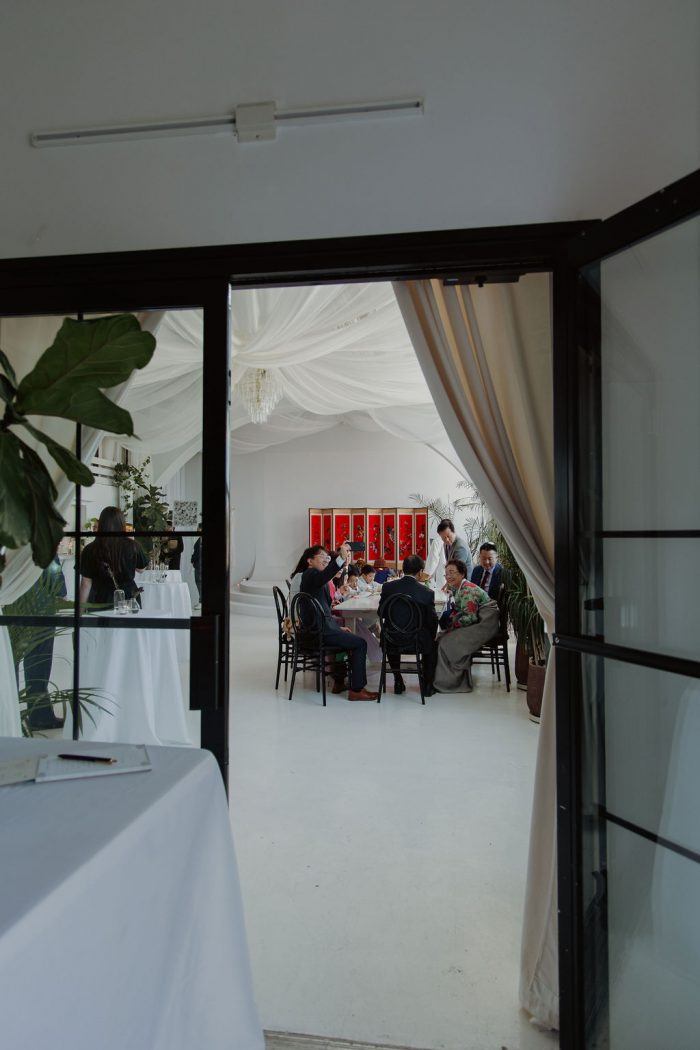
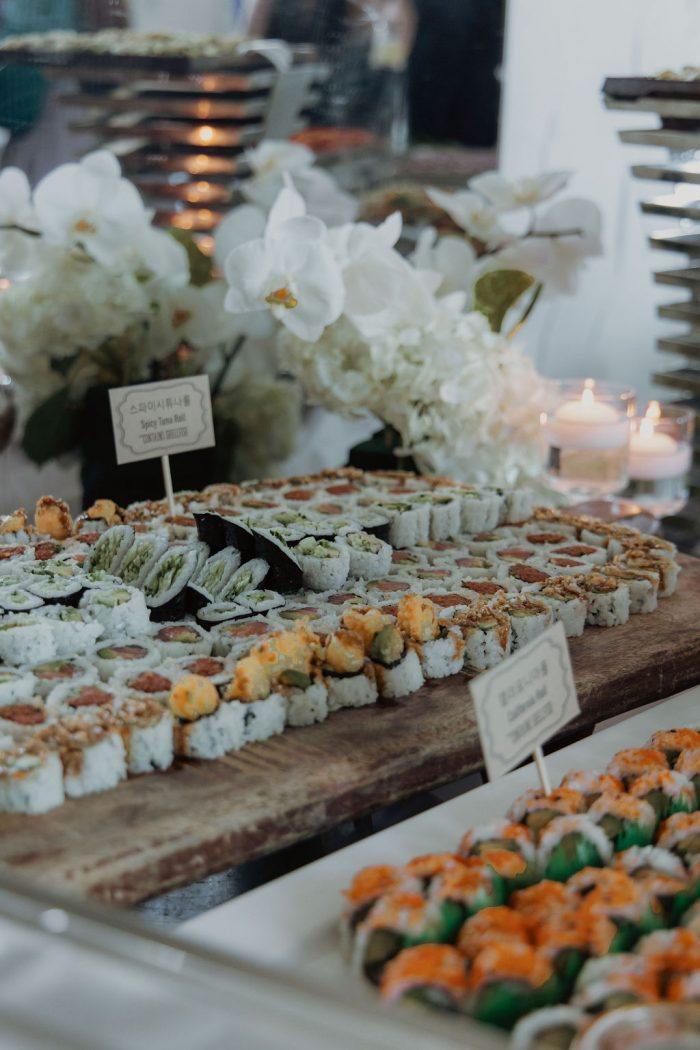
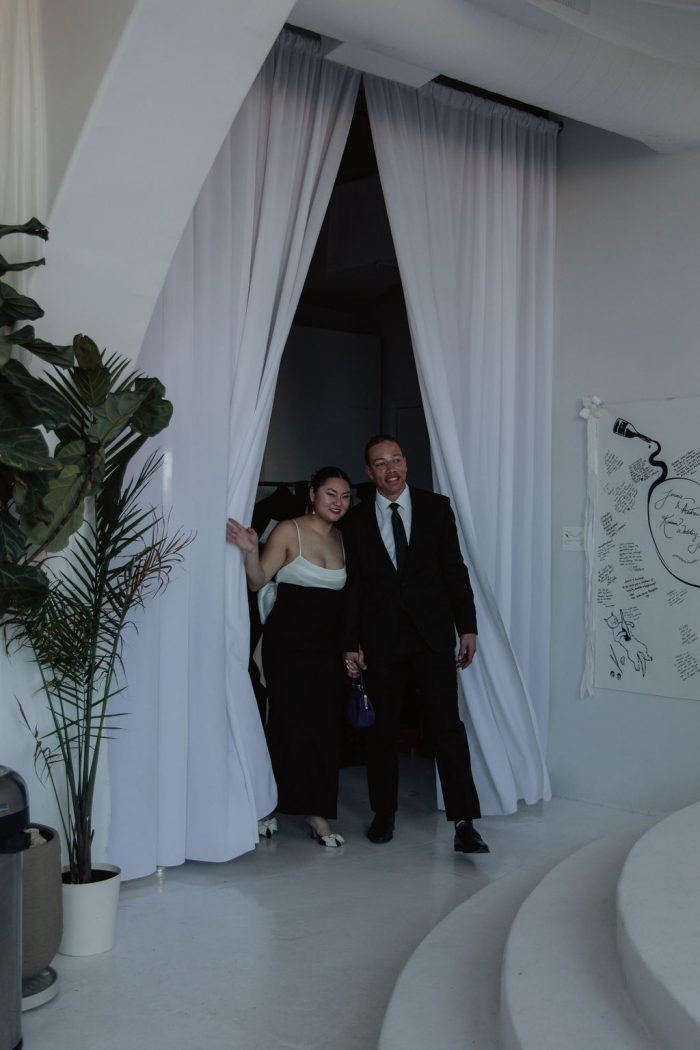
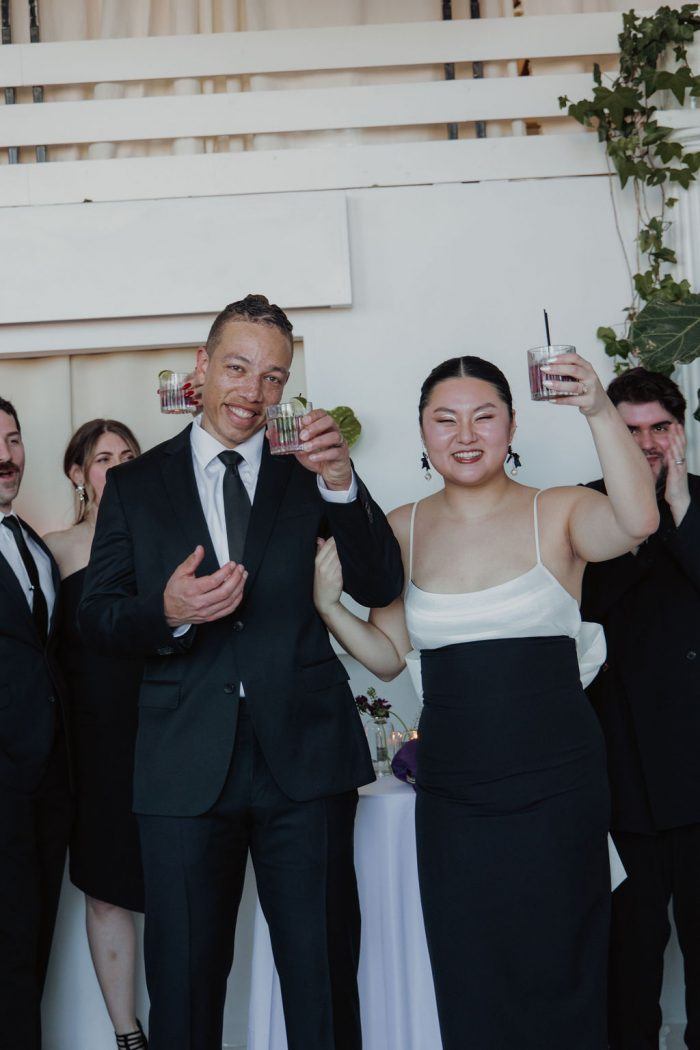
When it came to planning their Korean wedding, Jinnie and Andrew set out to design a day that honored their roots while celebrating their shared present. With a deep sense of intention and love for both tradition and individuality, the couple seamlessly blended a Korean paebaek ceremony with a modern New York City aesthetic. Held at the minimalist Atmosfera, their wedding was an expression of culture, artistry, and connection—brought to life with the help of their community.
What We Love About This Korean Wedding:
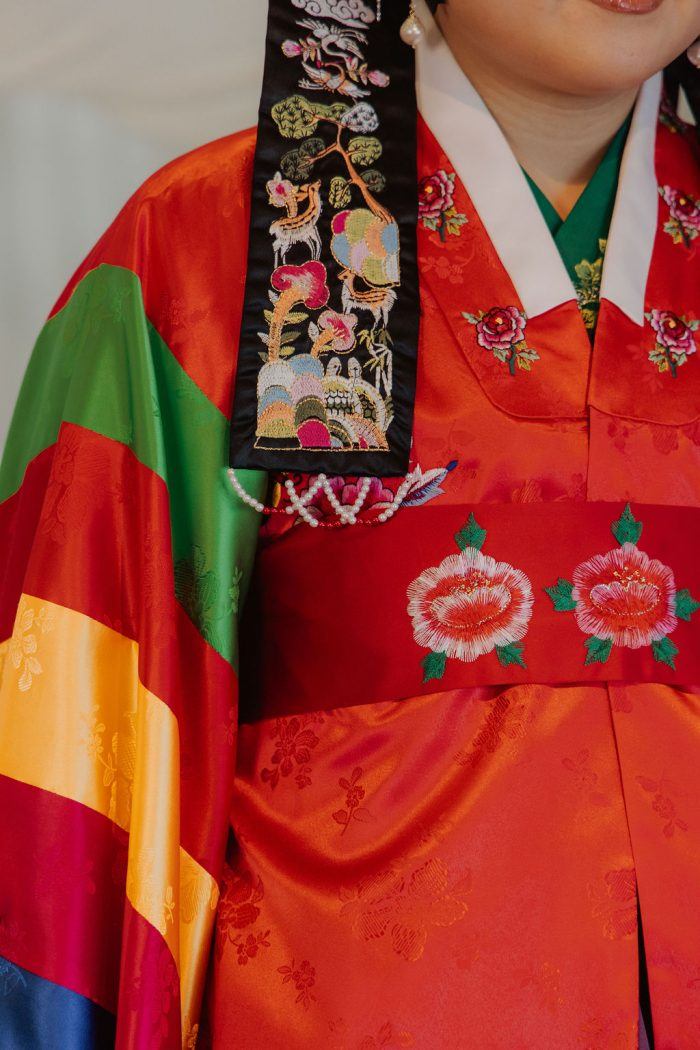
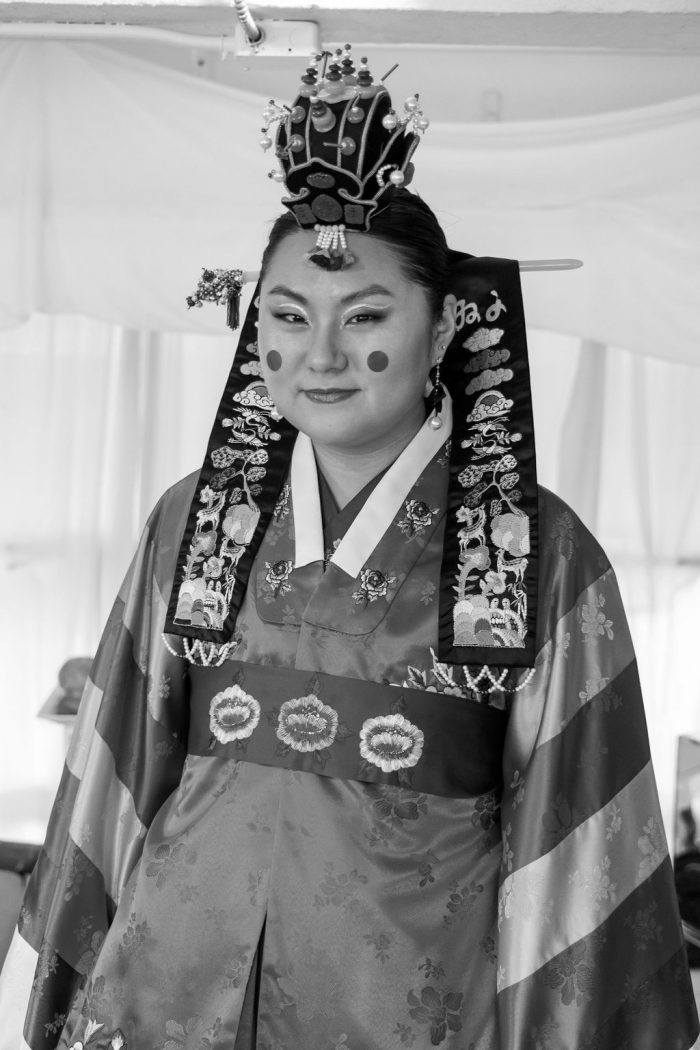
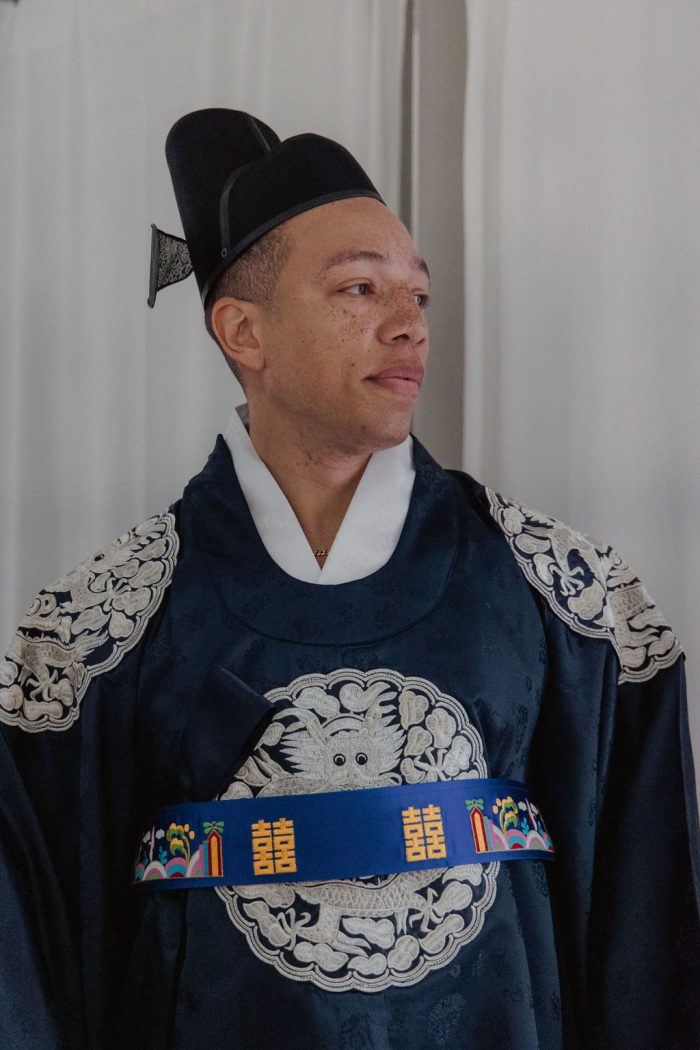
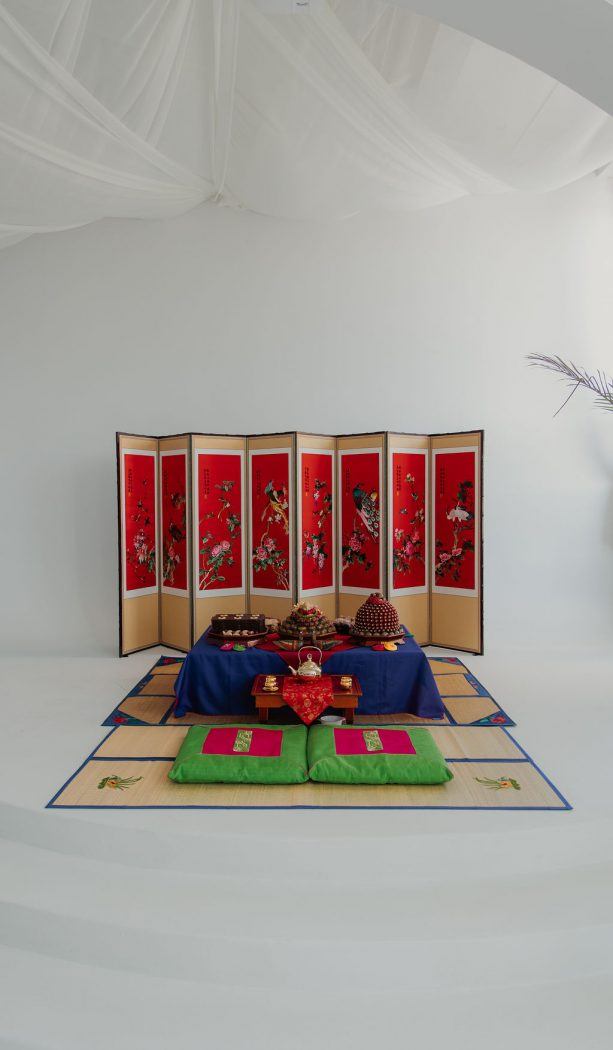
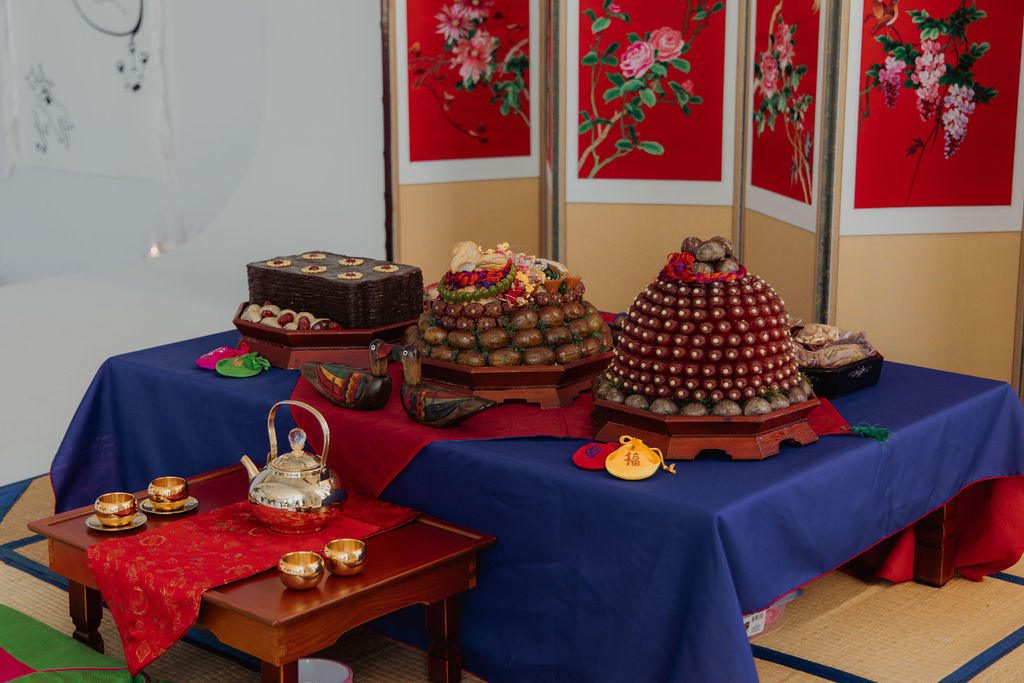
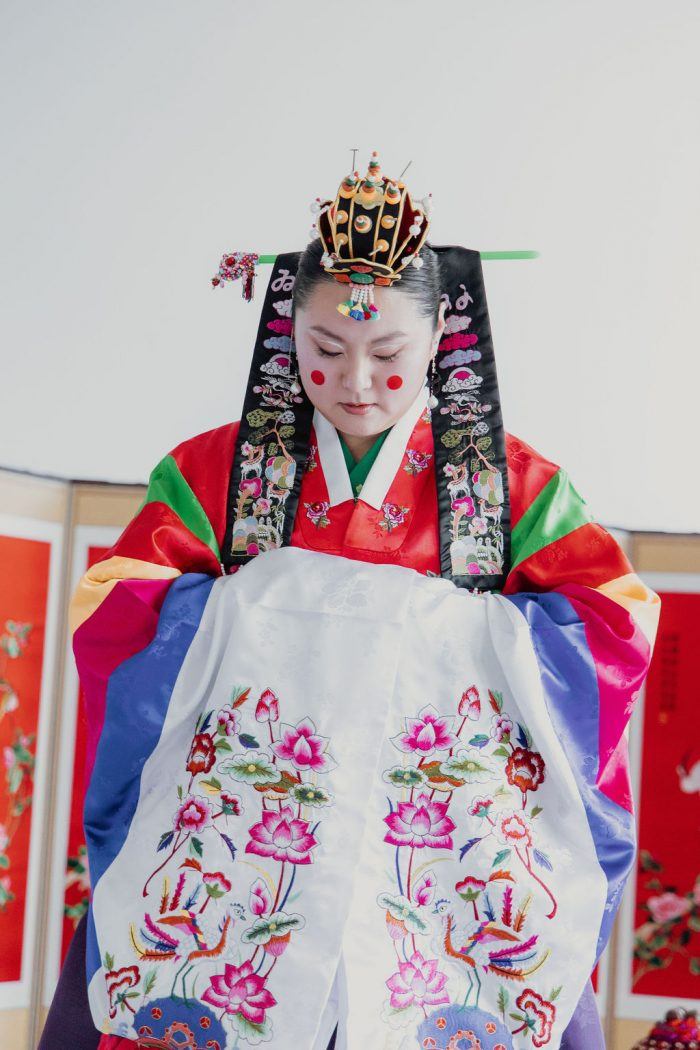
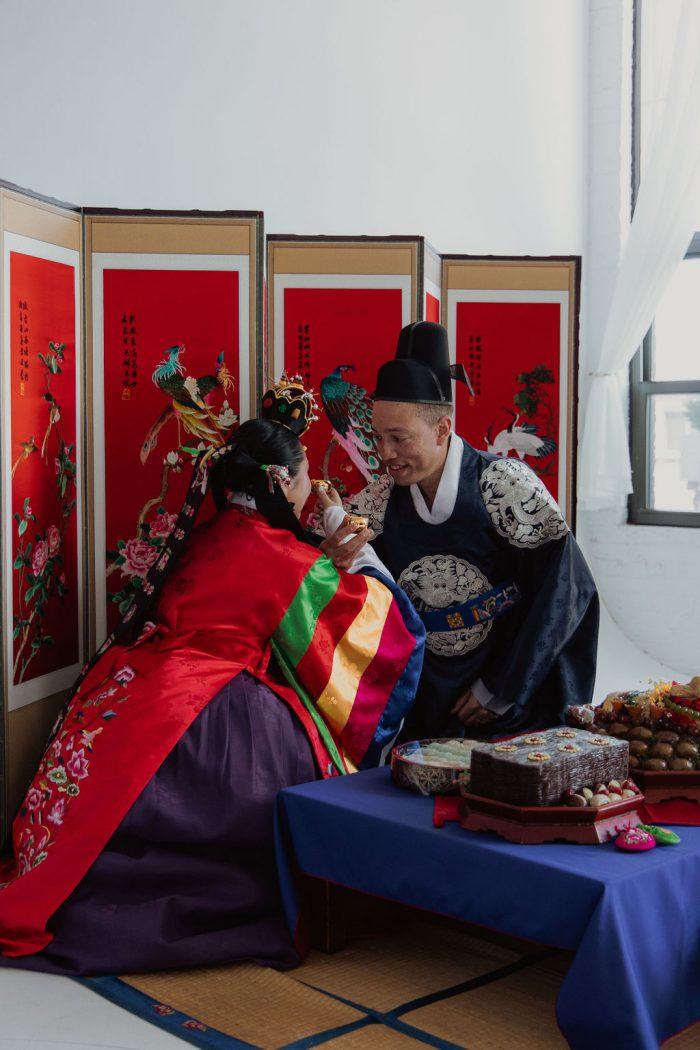
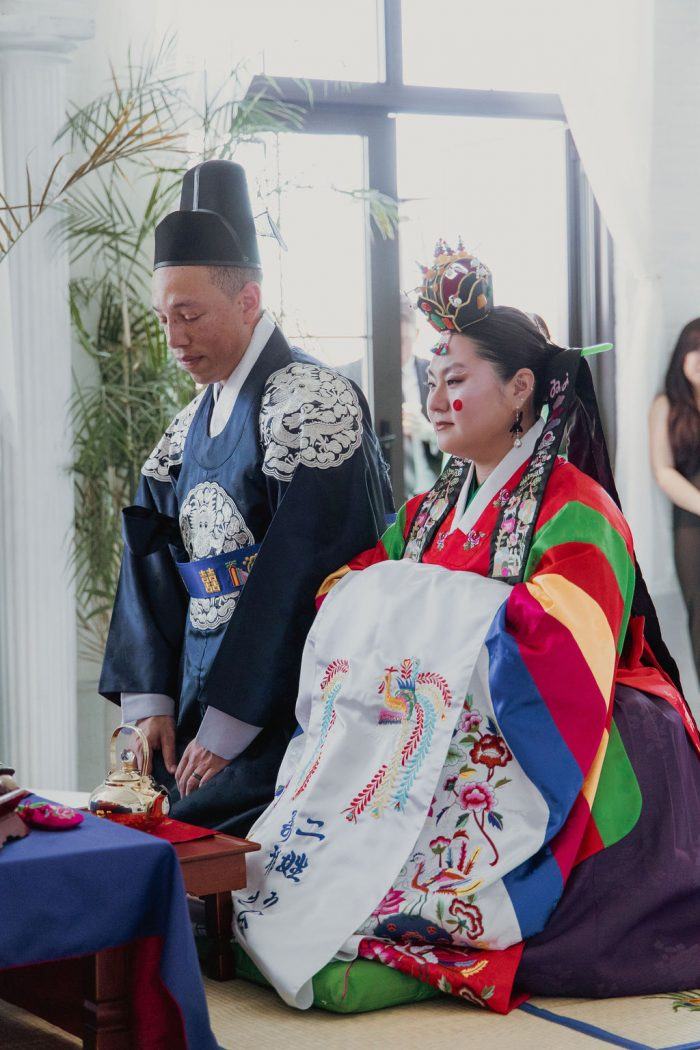
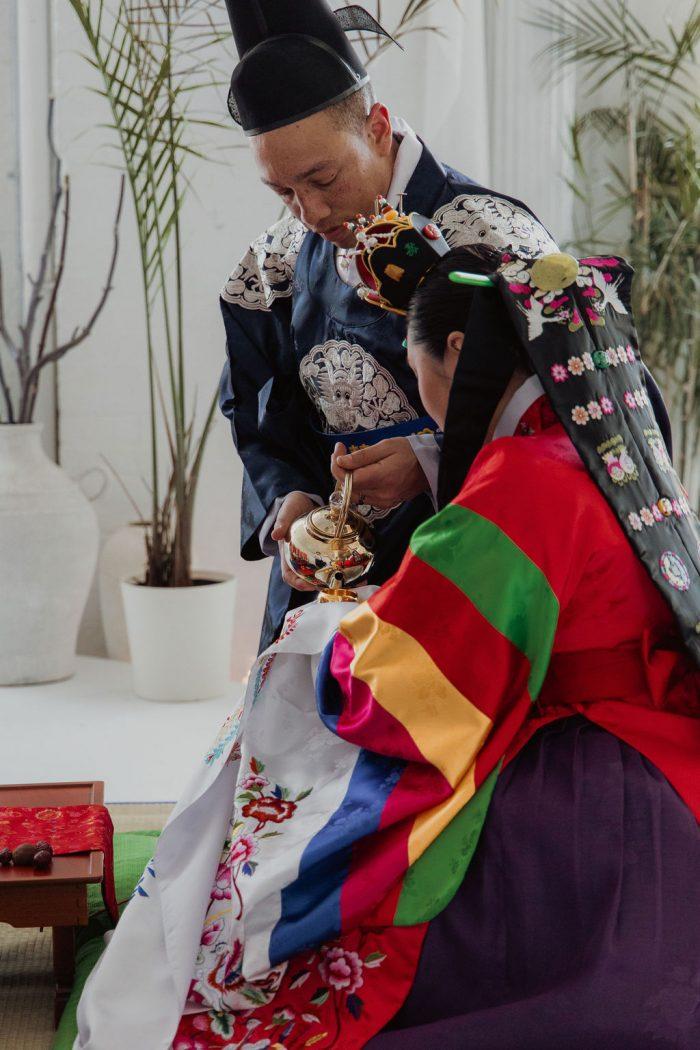
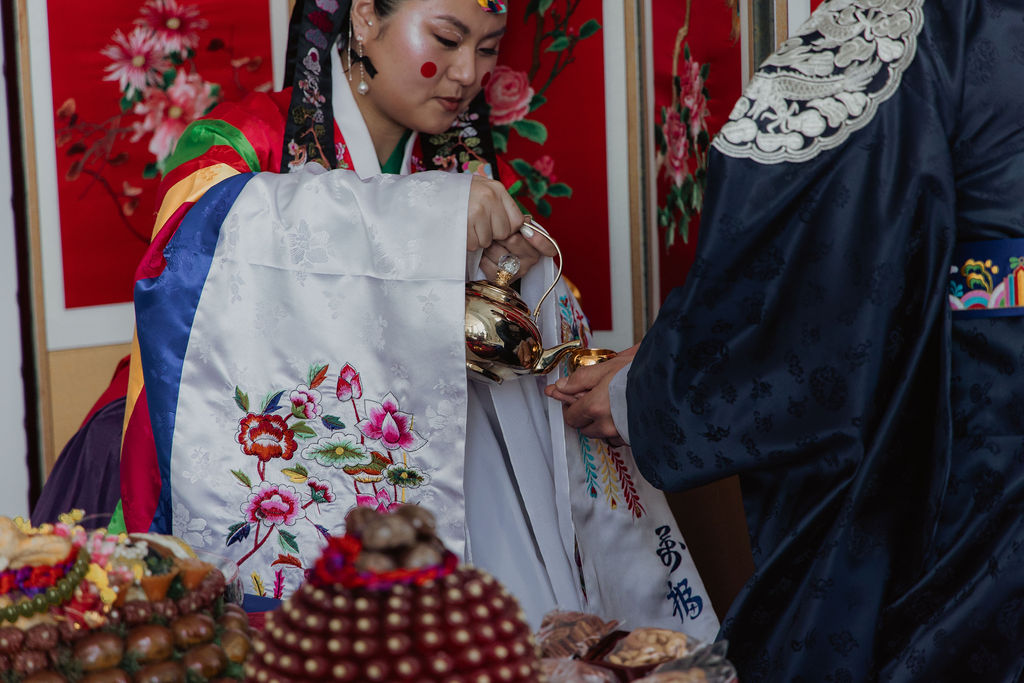
The couple’s traditional Korean wedding attire (hanboks) and emotional paebaek ceremony
A sleek and stylish modern portrait session around New York City landmarks
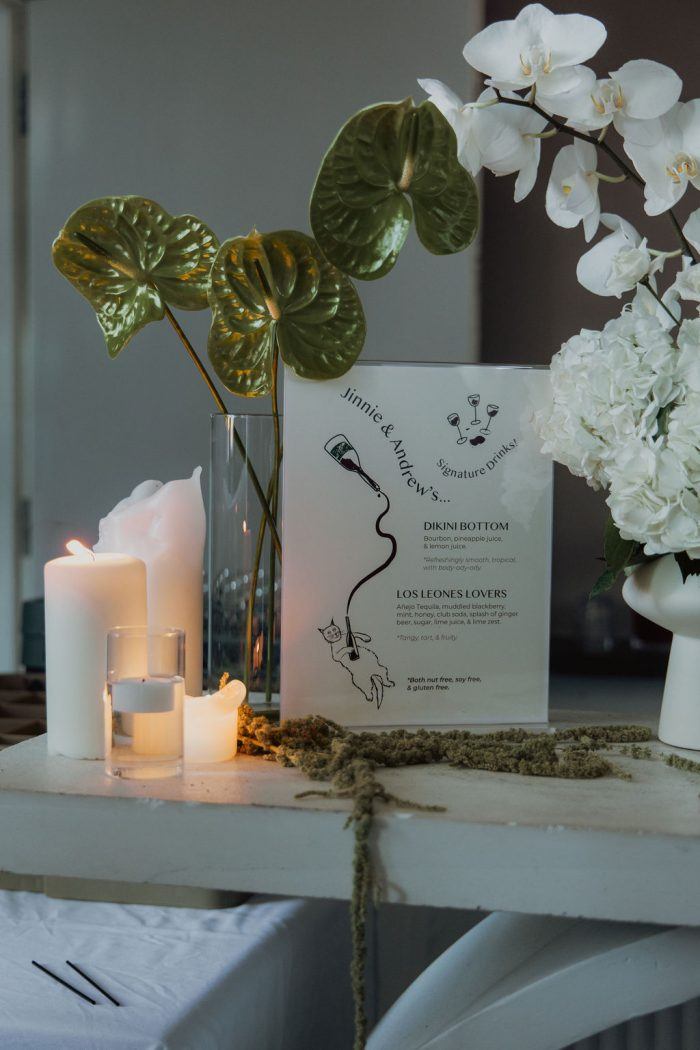
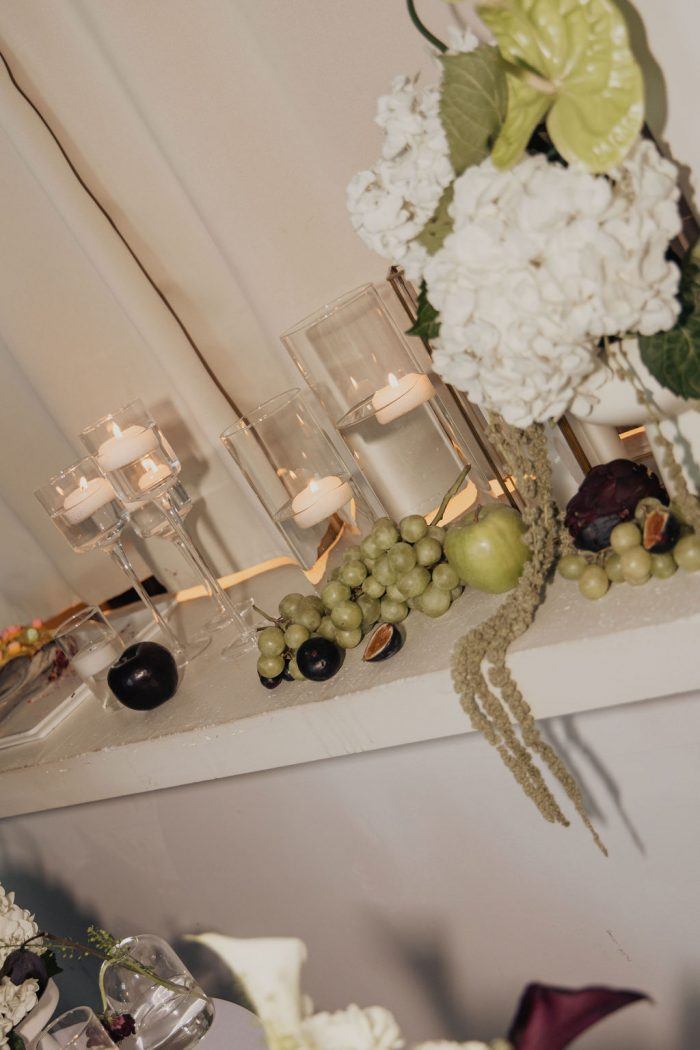
The intentional use of color—green and aubergine—and organic textures throughout the decor
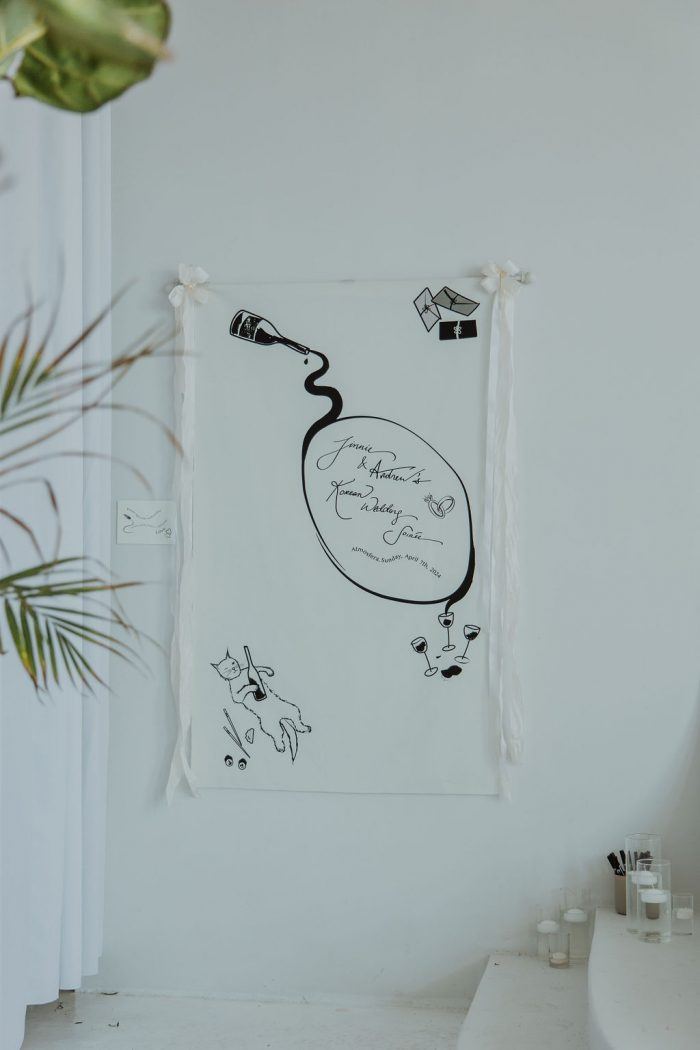
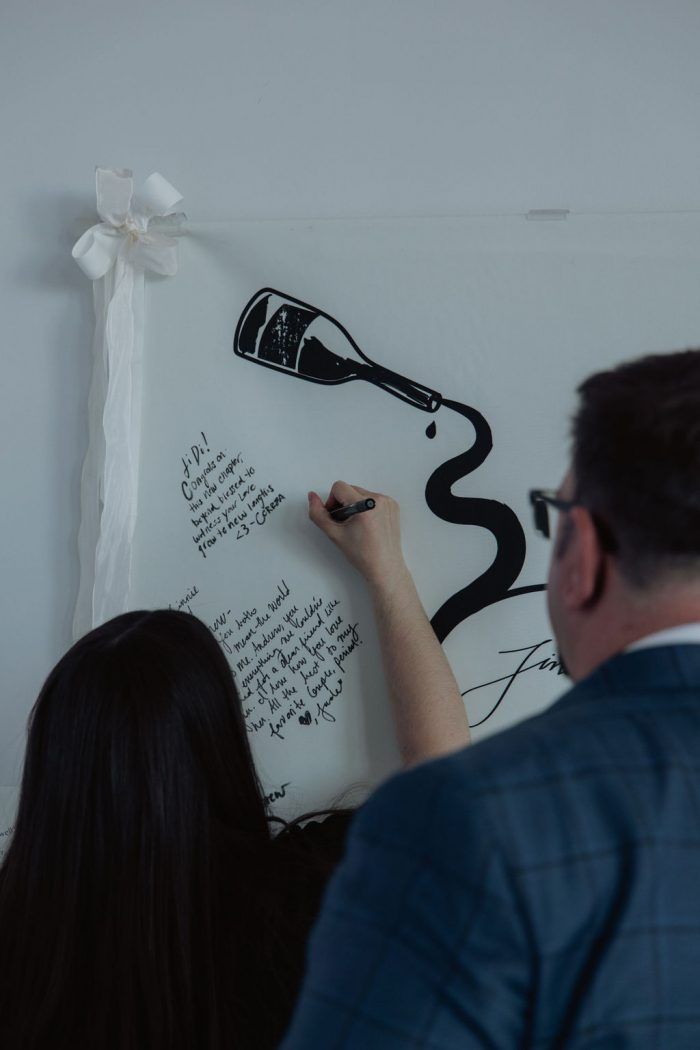
DIY details, from music and florals to table settings and video elements
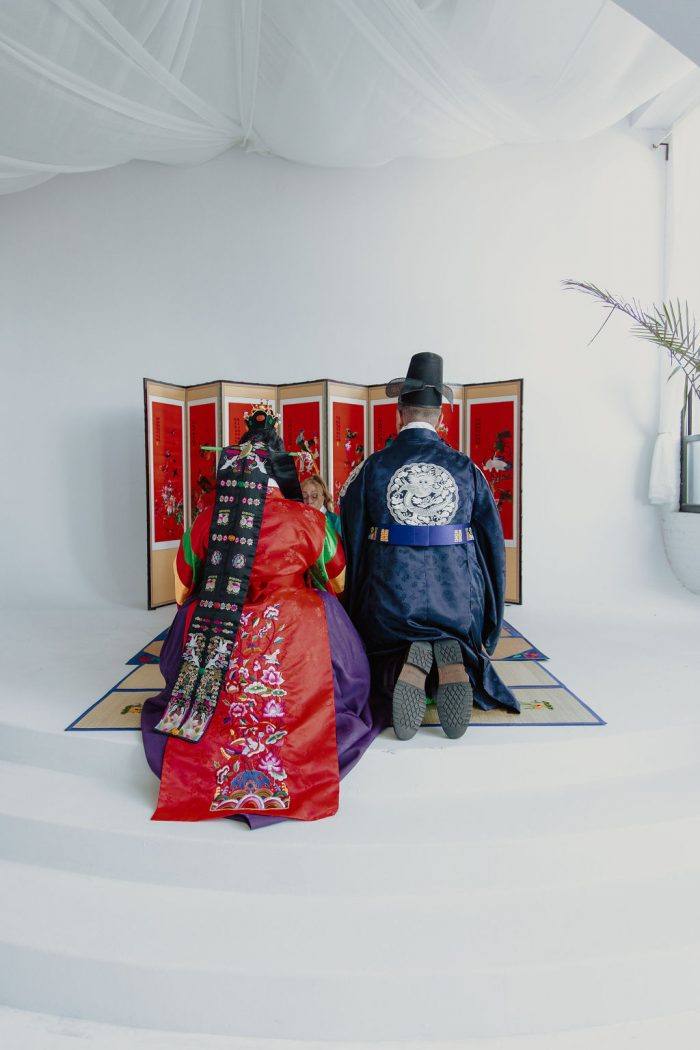
The heartfelt moment where the groom carried the bride on his back, symbolizing their first steps as one
Jinnie and Andrew wanted their Korean wedding to be more than just beautiful. It had to reflect their story. “We started planning with a desire to pay homage to the tradition of Korean culture while incorporating the contemporary and eclectic elements of our personalities,” they shared.
Their chosen venue, Atmosfera, served as the perfect blank canvas. Its clean, all-white interior became the backdrop for a day painted with emotion, tradition, and stylish contrast. “Our friend’s love and efforts were the paint that made the canvas into art.”
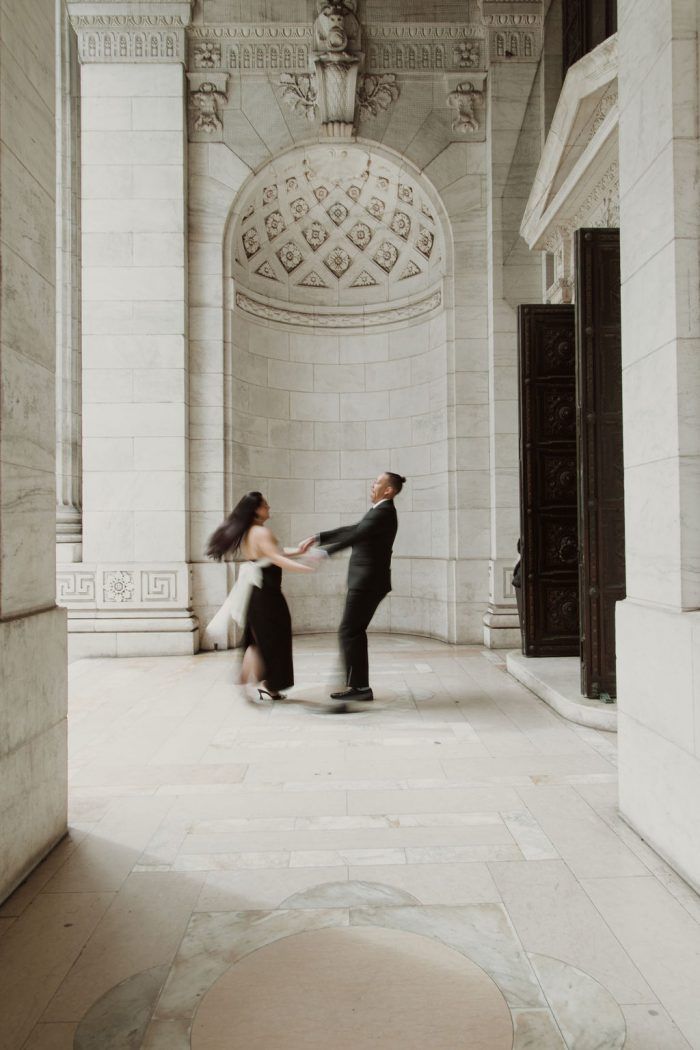
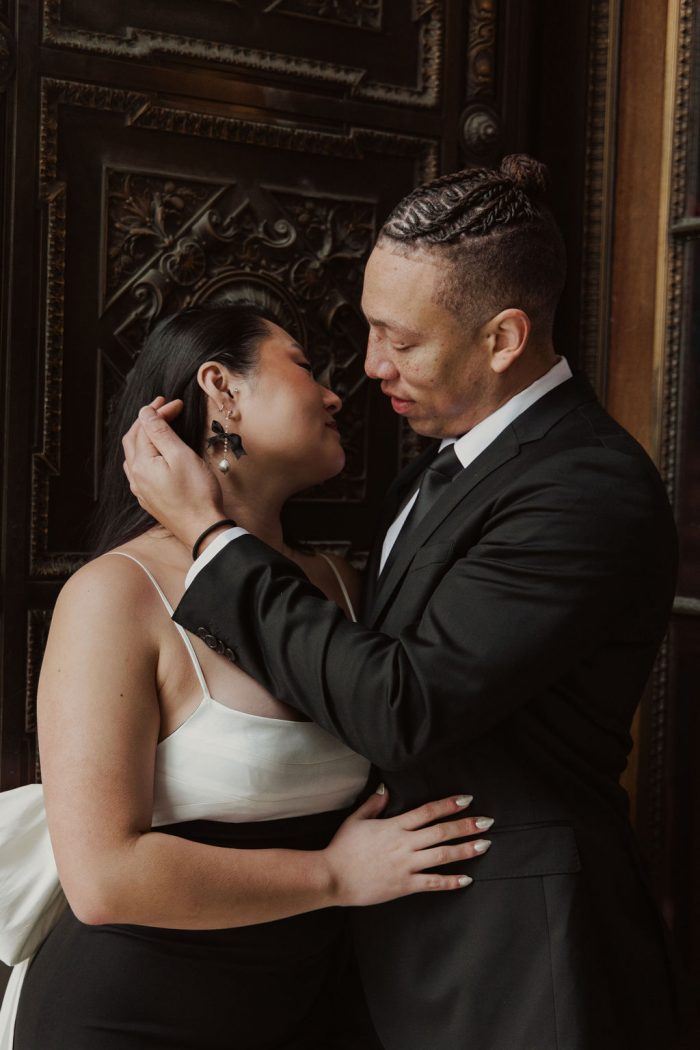
Wedding Fashion That Celebrated Heritage and Modernity
The couple’s outfits told their story visually, starting with the vibrant hanboks worn during the paebaek ceremony—a Korean wedding ritual that honors elders and family. “One of the most meaningful moments was when I carried Jinnie on my back in our hanboks and walked around the stage in front of our loved ones. It symbolized our first formal steps together as one.”
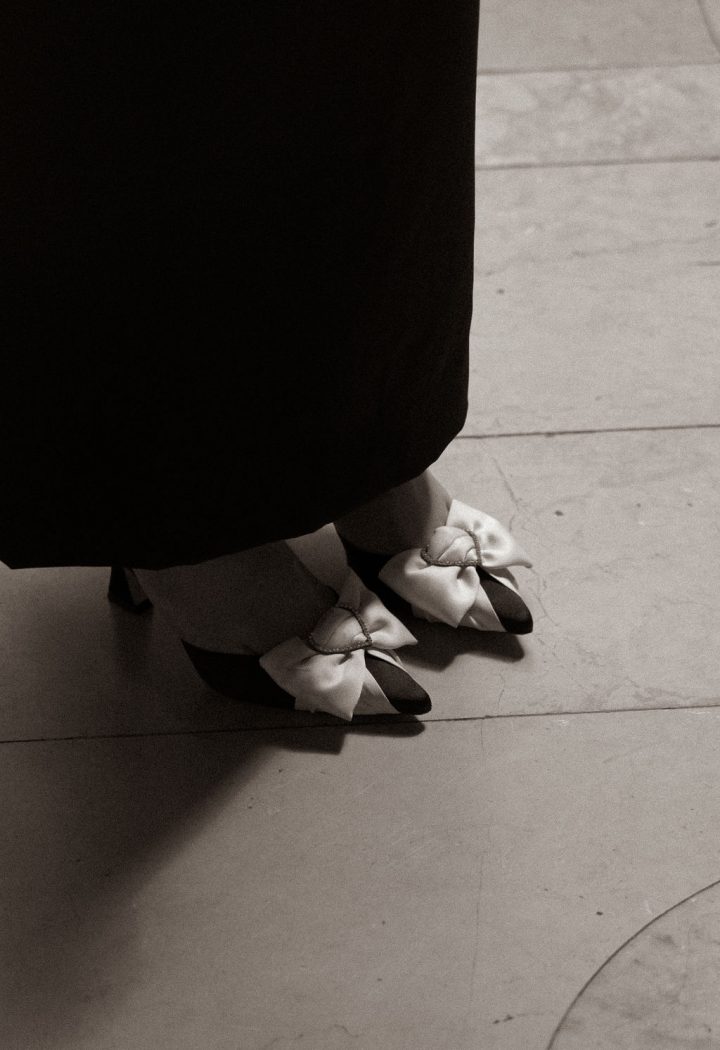
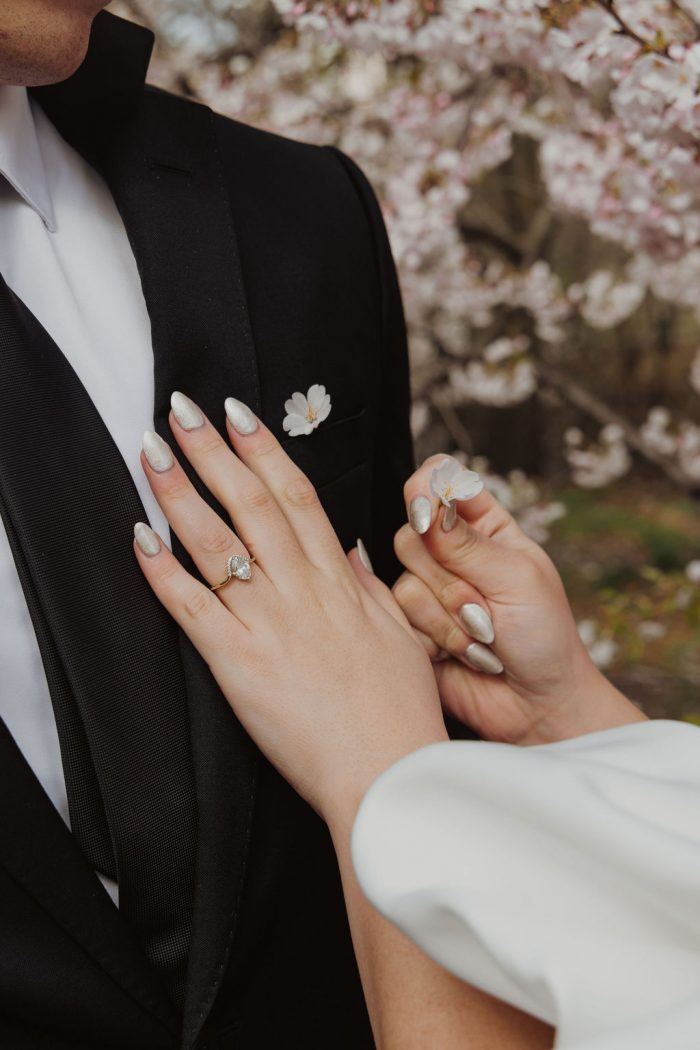
Later, for their modern NYC photo session, they switched into sleek outfits that matched the urban backdrop. Jinnie had her own fashion moment, wearing three incredibly chic looks throughout the shoot–each paired with her Reformation Wilson Bow mule heels (more on that later.)
Making the Day Their Own With DIY Touches
Jinnie and Andrew poured themselves into the details. “We nearly exclusively incorporated bespoke DIY elements to our wedding—from art pieces to videos, music, florals, and table settings. Our personalities were infused in everything.”
They leaned on their community to help bring their vision to life. “We knew we needed to lean on our friends and their understanding of our journey. We trusted our community implicitly.” Even with a few last-minute vendor delays and family-related stress, their loved ones stepped in and kept the day on track.
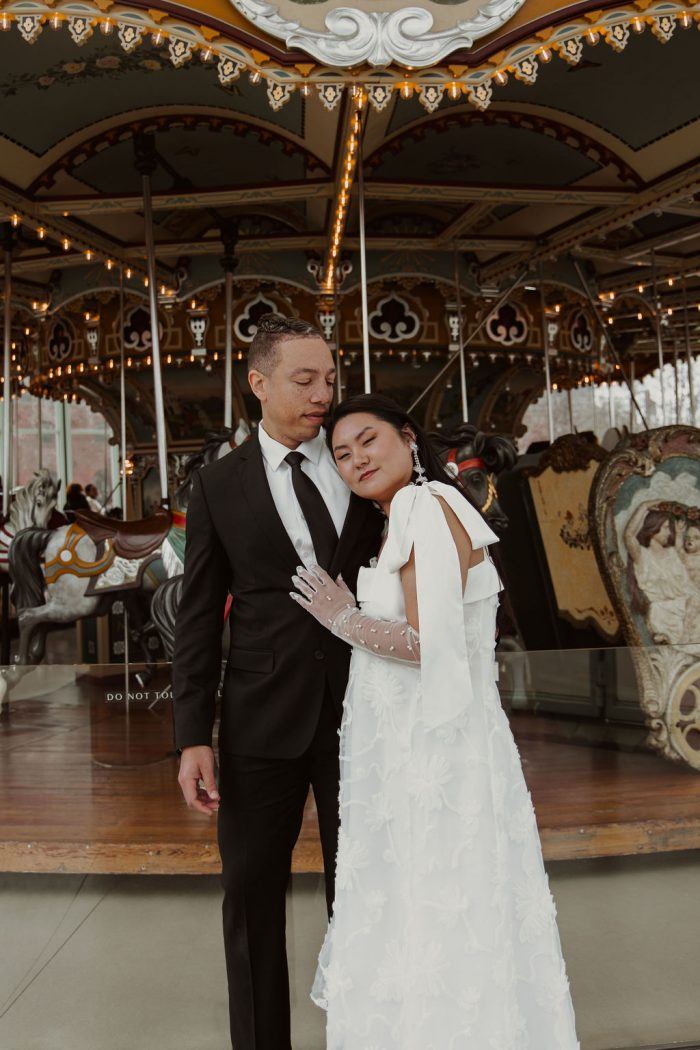
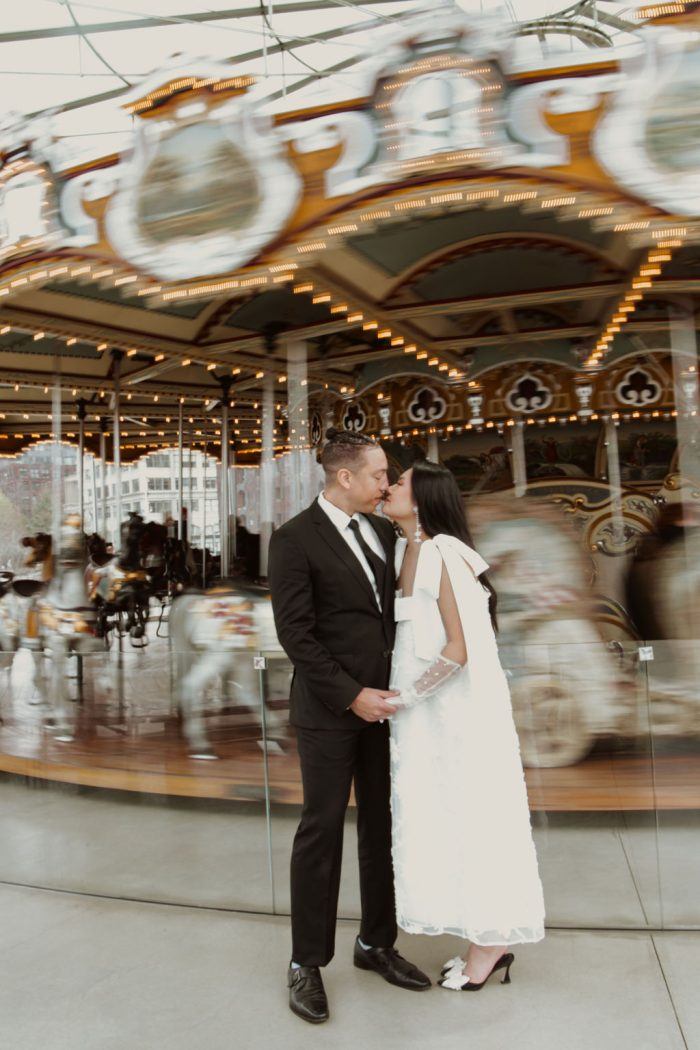
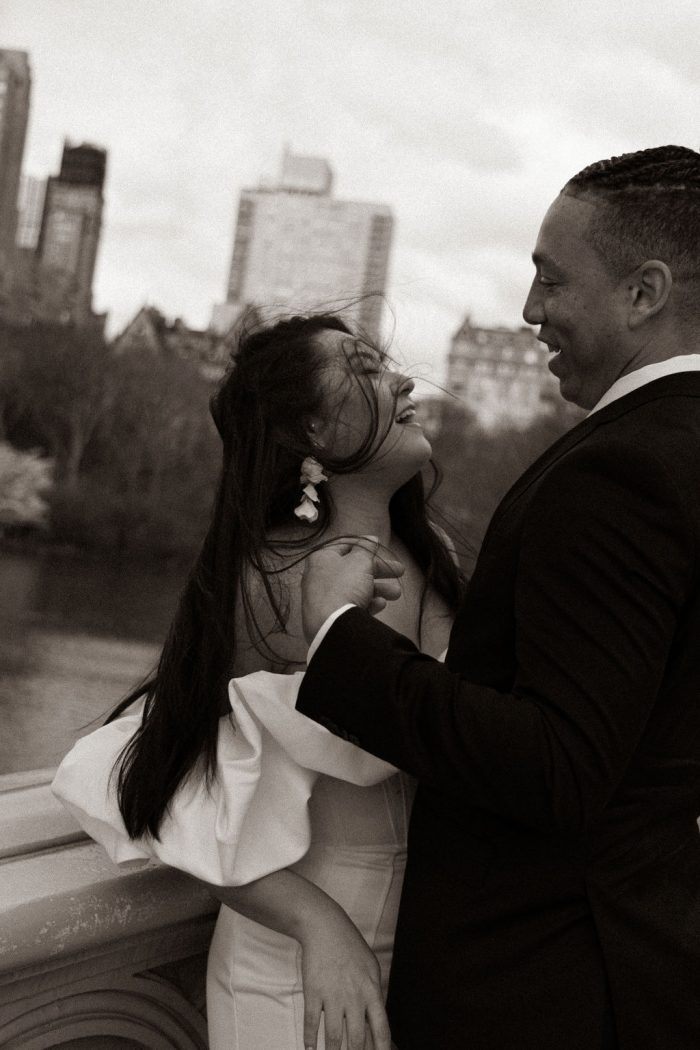
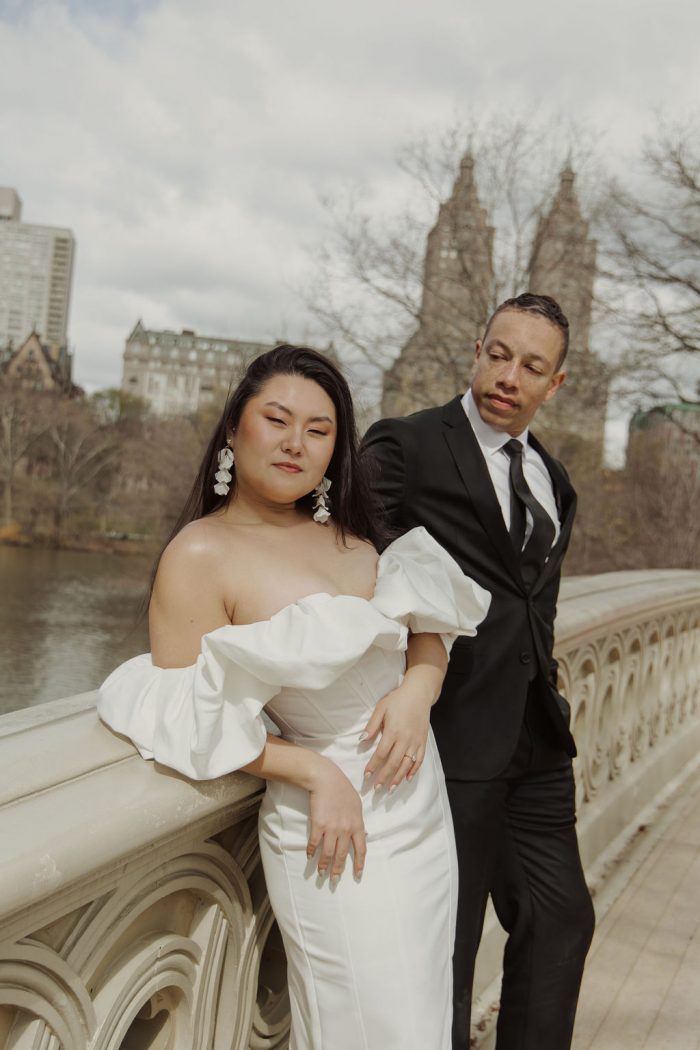
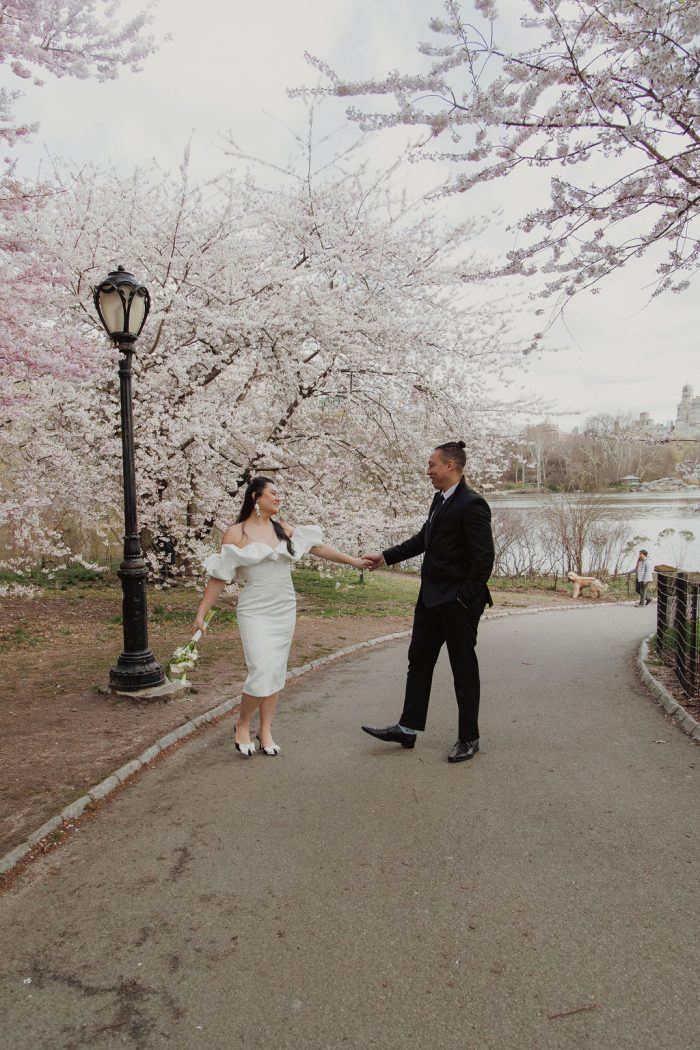
Couple Portraits Around NYC
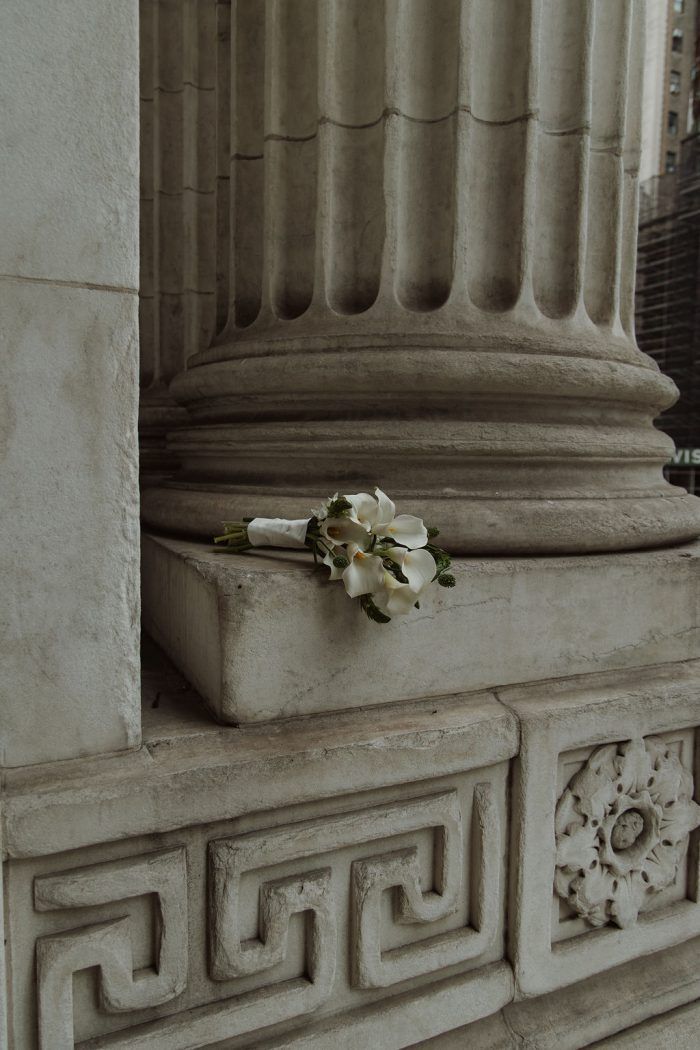
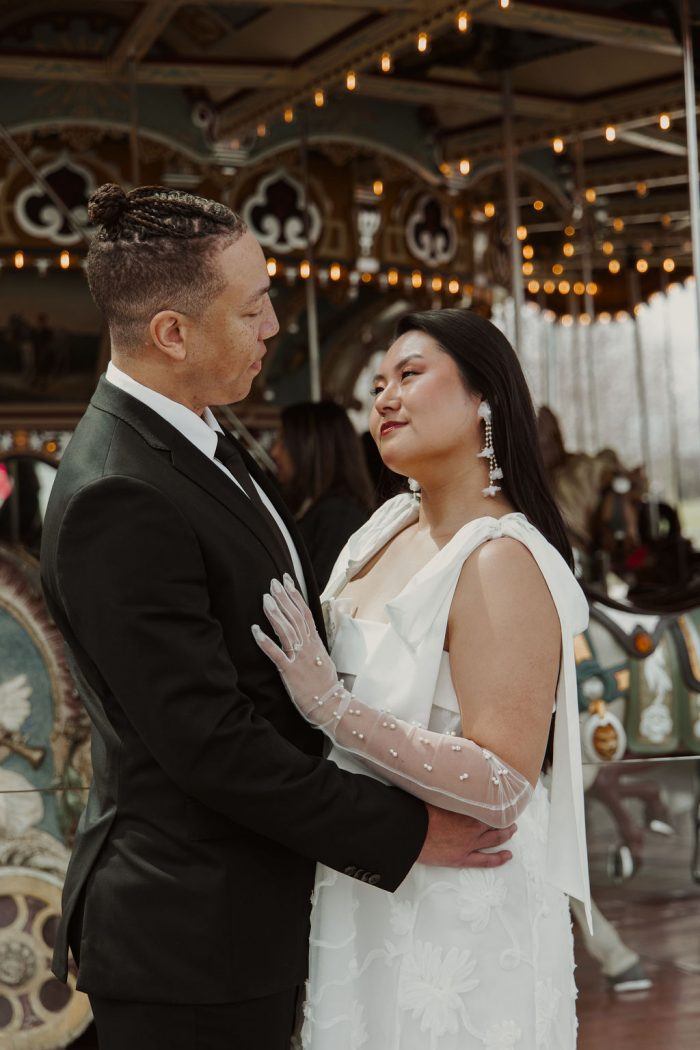
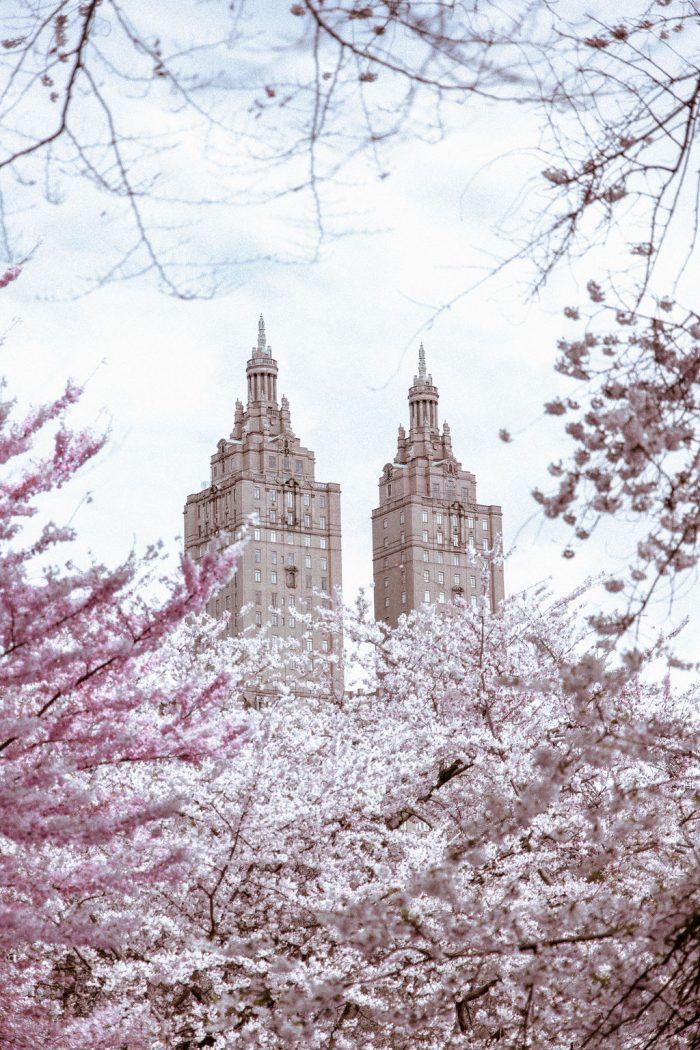
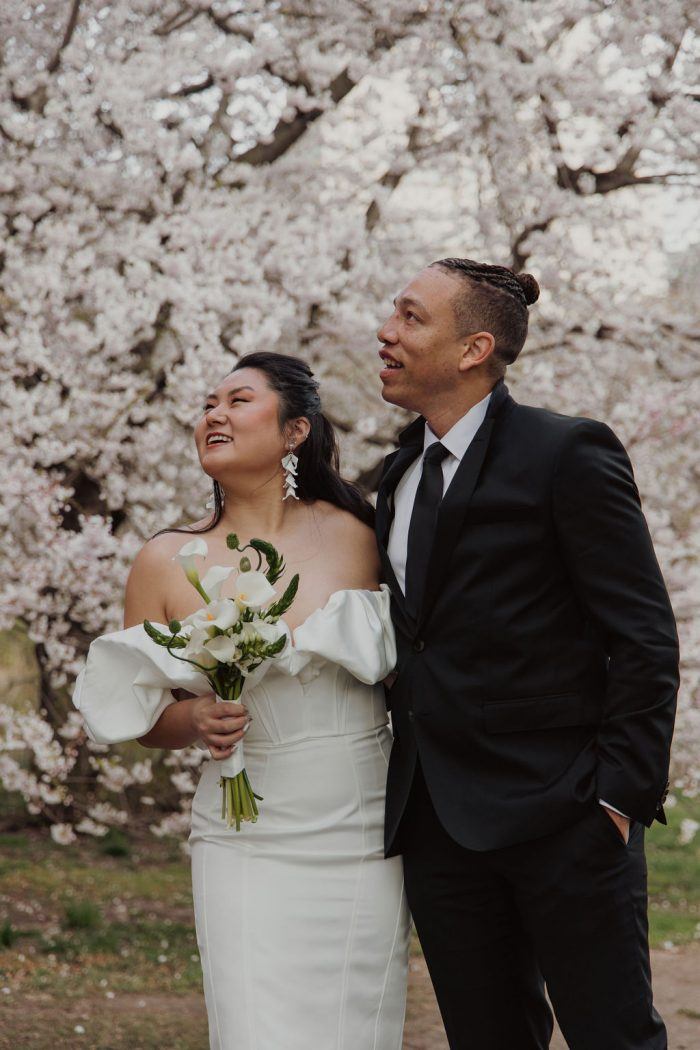
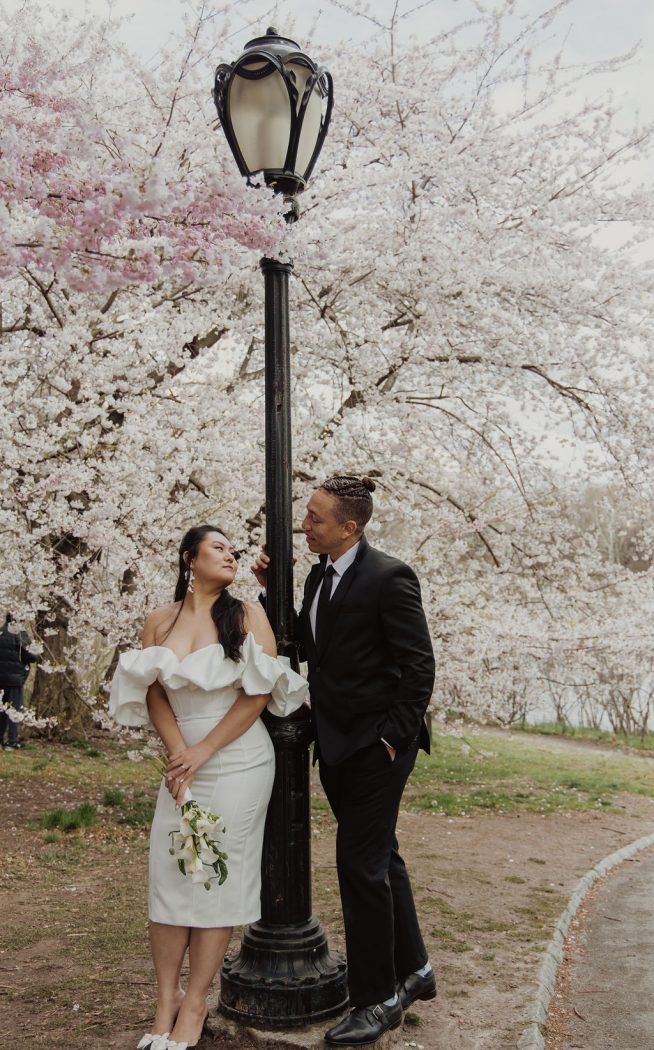
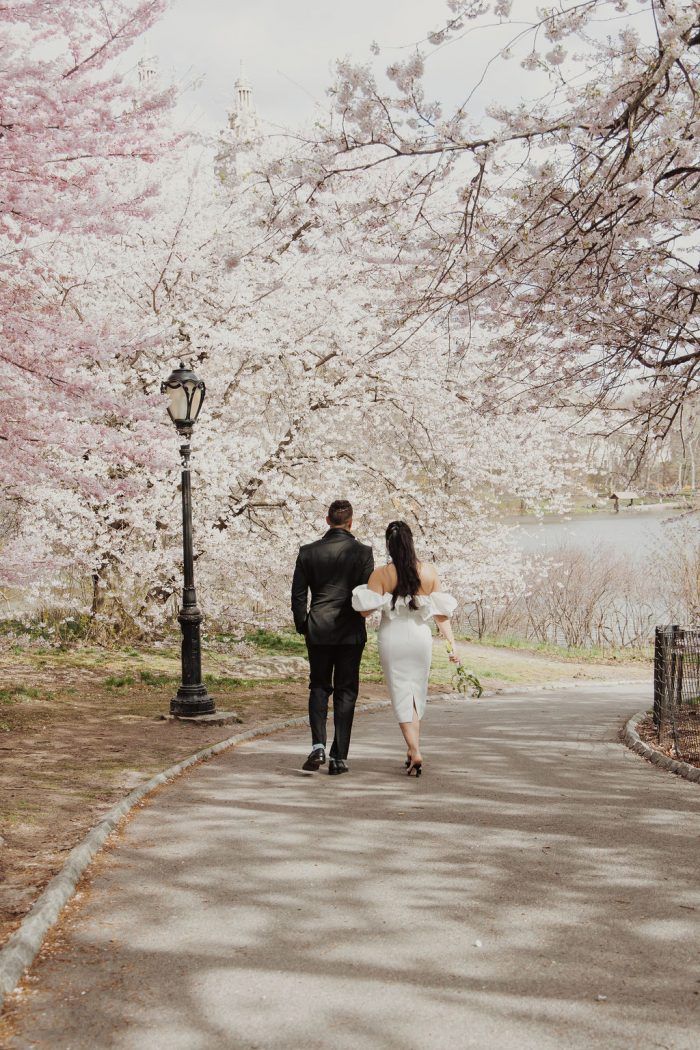
For portraits by Jane’s Carousel at Brooklyn Bridge Park, Jinnie sported an Aje Ursula midi dress with sheer embellished, white gloves. She followed it with the elegant, off-the-shoulder Samara dress by Line & Dot, styled with white flower earrings that perfectly complemented the park’s cherry blossoms. Her final look–also worn for the reception–was Marjorelle’s striking and sleek black and white Avori gown.
Shop Jinnie’s Looks:
Wedding Day Advice From the Couple
Reflecting on the day, the couple emphasized how important it was to stay grounded in the “why” of the celebration. “Plan your wedding always keeping in mind who the wedding is for. Don’t let the small stuff—logistics, stress, or expectations—detract from the joy of celebrating your love.”
Their only wish? “More time to dance and properly let loose with our friends and family!”


.jpg "Photographers")

