


Image by Heather Anderson Photography. See more of this inspiration shoot here.
Your wedding day will go by in a blink of an eye, but a few special keepsakes and memories will last a lifetime. That’s right, there are dozens of tangible wedding keepsakes—on top of photos—that’ll help preserve those special moments that made your wedding day one to remember. One of the most unique keepsakes is your bouquet.
At the end of your day when vows have been shared, rings have been exchanged, and you’ve made your grand exit, it’ll be tough saying goodbye to your show-stopping bouquet. But, your wedding day flowers don’t have to end up in the trash! We’ve got the top ways to preserve your bouquet so your florals will last long beyond your wedding day.
Reminders To Preserve Your Wedding Bouquet
Before diving into our inspiration, here are a few tips for preserving your wedding bouquet:
- Think about how you’d like to preserve your bouquet before the wedding day. This will avoid your flowers wilting and browning before being preserved
- During the hiring process, ask your potential florists if bouquet preservation is included in their pricing
- Don’t forget to include your bouquet preservation costs in your wedding budget
1. Hang Dry Your Bouquet
Simple, budget-friendly, and you can do it yourself—these are the reasons to love the hang drying method. The only thing you have to do is hang your flowers upside down for three to four weeks in a cool dry area of your home. It’s as simple as that. You’re guaranteed your dried flowers will last, and the dried florals will make for an eye-catching statement piece in your home.
Steps To Hang Dry Flowers:
- Prep your wedding bouquet by removing unwanted stems, leaves, or buds.
- When you’re happy with the look of your bouquet, gather the stems and tie them together tightly with twine. They’ll shrink as they dry so tie them tight enough that when the stems dry your flowers don’t fall to the floor.
- Hang your flowers upside down for 3-4 weeks in a dark, dry area of your home like a closet or unused bathroom.
- After your flowers have dried, it’s time to put them on display.
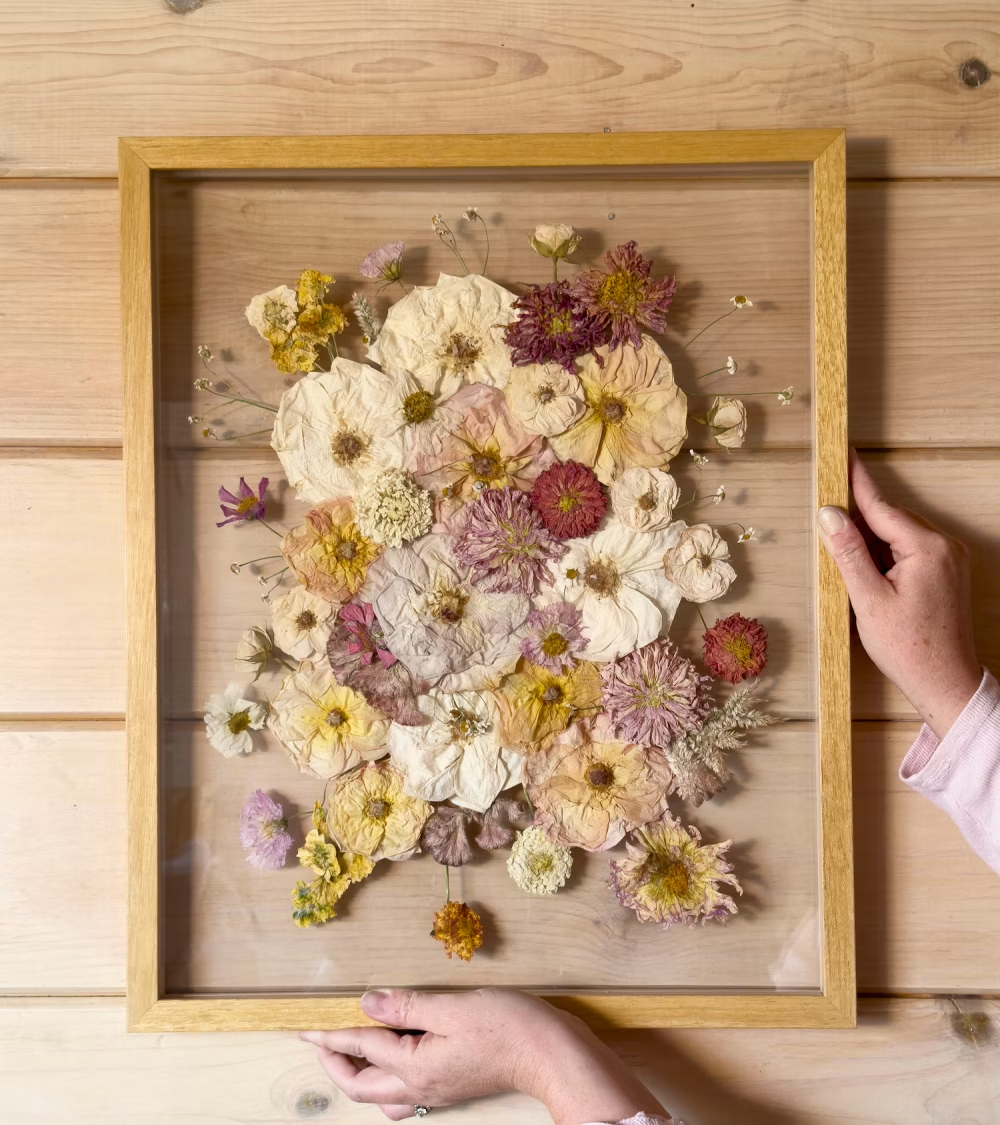 Image by For Keeps Florals
2. Press Your Wedding Flowers
Pressing your bouquet is also pretty straightforward. You’re flattening your flowers individually and recreating your bouquet on a 2D surface—making a beautiful piece of wall art that’ll be the perfect addition to your home. All you need is your bouquet, a stem trimmer, a heavy book, parchment paper, and a picture frame.
Steps To Press Your Wedding Flowers:
- Prep your wedding bouquet by cutting off stems, unwanted leaves or buds, and separate all the flowers from your bouquet bundle.
- Lay out parchment paper in a secure location and begin arranging the flowers you want to preserve face-up on the absorbing paper. Arrange the florals how you want to see them in the picture frame.
- When you’re happy with the layout, place another piece of parchment paper on top, then set a book or weighted item onto the second layer of parchment paper.
- Let your flowers sit for 3-4 weeks. Keep in mind that the longer your flowers sit, the better results you’ll have.
- Now that you have your dried, pressed flowers it’s time to put them in your picture frame and display it on your wall.
Pressing your wedding flowers can be a fun DIY project. But if you’re not crafty or don’t want to risk messing up, there are many companies—like For Keeps Florals—that’ll do it for you.
3. Preserve Your Wedding Bouquet In Resin
Preserving your wedding bouquet in resin—a runny chemical substance that gradually hardens into a tough plastic—is another popular choice. This process will freeze your bouquet in real time, which means your flowers won’t wilt away within a few days after your wedding. The vibrant colors and details will remain just as beautiful as they were when you walked down the aisle.
There are dozens of different techniques when it comes to preserving florals in resin. But, here are the perfect steps for beginners.
Steps To Preserve Your Wedding Bouquet In Resin:
- Prep your wedding bouquet by cutting off stems, unwanted leaves or buds, and separate all the flowers from your bouquet bundle.
- You can then press your flowers or hang dry your flowers following the instructions above. Before you can apply the resin your flowers need to be fully dried.
- When your flowers have dried, arrange the flowers into the silicone mold.
- Pour resin into the mold around your flowers in layers about an inch thick. Allow each layer to dry for 24 hours before pouring the next layer. When all the flowers have been covered, let the resin dry and sit in the mold for 1 week.
4. Create A Christmas Ornament For Your Tree
Christmas lovers, DIY fanatics, and minimalists—preserving petals from your bouquet in a Christmas ornament is a small, budget-friendly way to keep a tangible piece of your wedding day. All you need is your bouquet, stem trimmers, and a clear ornament.
Steps To Create A Floral Christmas Ornament:
- Prep your wedding florals by cutting off stems and preserving the buds you want to display on your Christmas tree. Try choosing smaller flowers that’ll fill in the top of your ornament.
- Start putting the flowers into the ornament, hang them on your tree, and let the flowers dry over time.
5. Turn Your Bouquet Into A Paperweight
Add it to your desk at home, bring it to work, or place it on a shelf for decoration—no matter where you have in mind, a paperweight is a feel-good keepsake that’s both useful and decorative.
Designing your floral arrangements is one of the most exciting parts of planning a wedding. And because florals are a main décor element, your choice of florists shouldn’t be taken lightly. Lucky for you, you’re just one click away from the top wedding florists from around the world.

Image by Jes Workman. See more of this real wedding here.


.jpg "Photographers")

Nice post.
I enjoyed reading it.